Responsive Data-driven Timeline Plugin For jQuery - simpleTimeline
| File Size: | 11.9 KB |
|---|---|
| Views Total: | 12602 |
| Last Update: | |
| Publish Date: | |
| Official Website: | Go to website |
| License: | MIT |

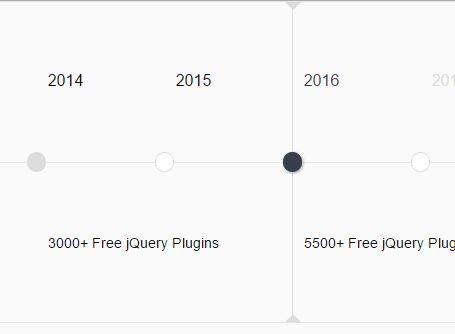
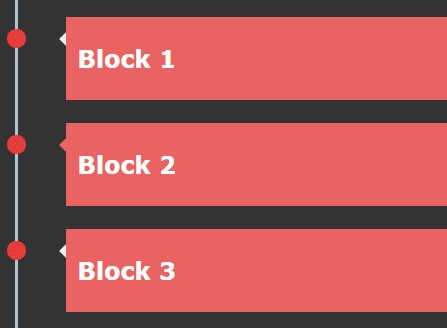
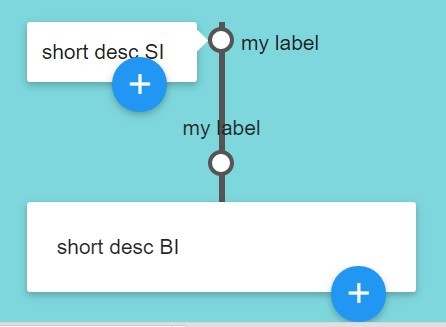
simpleTimeline is a simple yet configurable jQuery plugin used to render a responsive, dynamic, horizontal timeline from an array of data elements (horizontal bar groups).
Basic usage:
1. Load the necessary jQuery library and the jQuery resize plugin in your html document.
<script src="//code.jquery.com/jquery.min.js"></script>
<script src="resize.js"></script>
2. Load the jQuery simpleTimeline plugin's files in the document.
<link rel="stylesheet" href="simpleTimeline.css">
<script src="simpleTimeline.js"></script>
3. Create a DIV element that will be served as the container for your timeline.
<div id="timeline"></div>
4. Define an array of data elements to be presented in the timeline.
/* [ // array of layers (horizontal bar groups)
  [ // array of data elements
    { // data element (bar)
      id: string, // unique identifier
      start: number, // start < end
      end: number, // end > start
      label: string, // optional (if empty, id is displayed)
      css: object, // optional, passed to jQuery css() method
      className: string // optional CSS class name(s)
    },
    ... // optional: more data elements
  ],
  ... // optional: more layers
];
*/
var data = [
  [{ id: 'Dingo', start: -50000, end: -32000, className: 'styleA' },
   { id: 'Ringo', start: -3000, end: 0, className: 'styleA' }],

  [{ id: 'Looong', start: -42000, end: -1492, className: 'styleB' },
   { id: 'Hoko', start: -980, end: -332, className: 'styleB' }],

  [{ id: 'Wunz', start: -4700, end: -2000, className: 'styleC' },
   { id: 'Inzi', start: -2000, end: -1000, className: 'styleC' },
   { id: 'Misi', start: -2000, end: 1500, className: 'styleC' }]
];
5. Define an ordered array of phases (left to right, oldest to newest).
var options = {
    phases: [
      { start: -50000, end: -30000, indicatorsEvery: 20000, share: .2 },
      { start: -30000, end: -5000, indicatorsEvery: 25000, share: .07, className: 'timeline-unused-phase' },
      { start: -5000, end: 2000, indicatorsEvery: 1000, share: .73 }
    ]
};
6. Render the timeline inside the DIV element you created.
$('#timeline').simpleTimeline(options, data)
7. All default options.
var options = {

    // ordered array of phases (left to right, oldest to newest)
    phases: [
        { // phase object
          start: number, // start point
          end: number, // end point
          indicatorsEvery: number, // interval of indicator lines
          share: number, // ]0;1] must sum up to 1 over all phases
          className: string // optional: CSS class name
        },
        ... // optionally more phases
      ],

      // margin of the timeline box within the container
      boxMargin: 5,

      // height in pixels, at least 2 * borderWidth + fontSize
      barHeight: 16,

      // font size in pixels
      fontSize: 12,

      // border width in pixels
      borderWidth: 2,

      // space between bars in pixel
      verticalBarSpacing: 3,

      // min width of timeline box,
      minWidth: 500,

      // height of indicator labels in pixels
      headerHeight: 20,

      // formatting of indicator labels
      formatHeader: function(v) { return v; },

      // optional, if false, then not possible
      toggle: {
        collapseTooltip: 'Collapse Timeline', // tooltip text for collapse symbol
        expandTooltip: 'Expand Timeline' // tooltip text for expand symbol
      }
};
Change log:
2016-12-17
- bugfix
2016-12-09
- allows binding popup html to individual bars
2016-11-15
- JS & CSS update
2016-11-09
- fixes.
This awesome jQuery plugin is developed by eScienceCenter. For more Advanced Usages, please check the demo page or visit the official website.