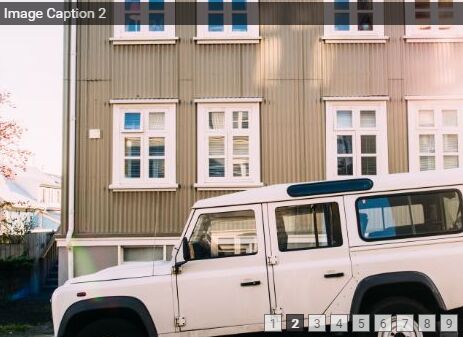
Mobile-compatible Slider/Slideshow Plugin For jQuery - Camera
| File Size: | 2.51 MB |
|---|---|
| Views Total: | 24147 |
| Last Update: | |
| Publish Date: | |
| Official Website: | Go to website |
| License: | MIT |
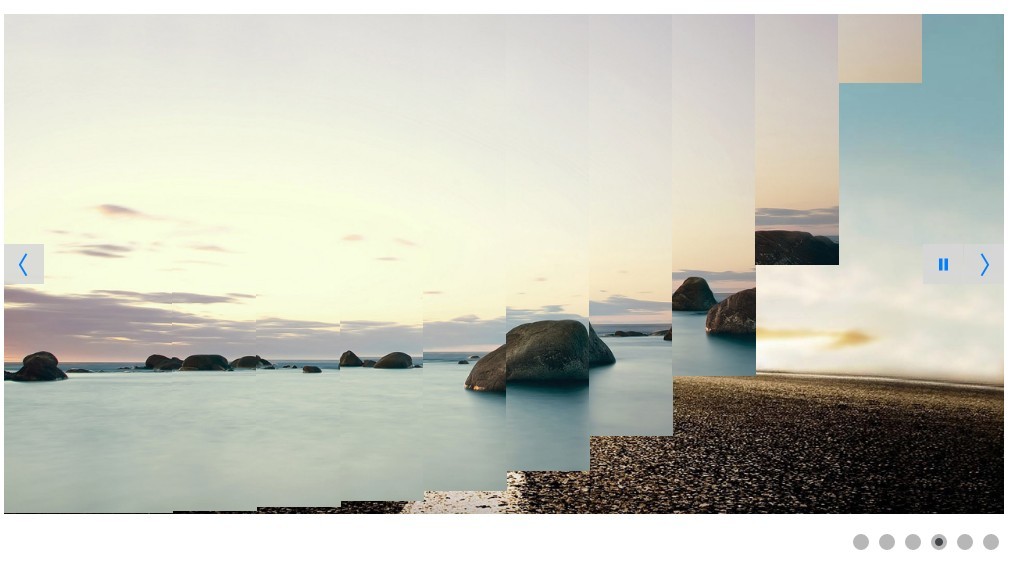
Camera is a powerful, configurable, responsive, mobile-friendly jQuery slideshow/slider/carousel plugin that comes with fancy slice transition effects between slides.
Basic usage:
1. Load necessary jQuery JavaScript library and the jQuery Camera plugin's files into the document.
<link href="camera.css" rel="stylesheet">
<script src="jquery.min.js"></script>
<script src="camera.min.js"></script>
2. Insert images & captions to the camera slider.
<div class="camera_wrap">
  <div data-src="1.jpg">
      <img src="1.jpg">
      <div class="camera_caption">
        <p>Caption 1</p>
      </div>
  </div>
  <div data-src="2jpg">
      <img src="2.jpg">
      <div class="camera_caption">
        <p>Caption 2</p>
      </div>
  </div>
  <div data-src="3.jpg">
      <img src="3.jpeg">
      <div class="camera_caption">
        <p>Caption 3</p>
      </div>
  </div>
</div>
3. Activate the camera slider with default settings.
jQuery('#camera_wrap').camera();
4. Activate the camera slider with default settings.
jQuery('#camera_wrap').camera({

  // topLeft, topCenter, topRight, centerLeft, center, centerRight, bottomLeft, bottomCenter, bottomRight
  alignment: 'center',

  // true, false
  autoAdvance: true,

  // true, false. Auto-advancing for mobile devices
  mobileAutoAdvance: true,

  // 'leftToRight', 'rightToLeft', 'topToBottom', 'bottomToTop'
  barDirection: 'leftToRight',

  // 'bottom', 'left', 'top', 'right'
  barPosition: 'bottom',

  // the number of columns
  cols: 6,

  //for the complete list http://jqueryui.com/demos/effect/easing.html
  easing: 'easeInOutExpo',

  //leave empty if you want to display the same easing on mobile devices and on desktop etc.
  mobileEasing: '',

  // 'random','simpleFade', 'curtainTopLeft', 'curtainTopRight', 'curtainBottomLeft', 'curtainBottomRight', 'curtainSliceLeft', 'curtainSliceRight', 'blindCurtainTopLeft', 'blindCurtainTopRight', 'blindCurtainBottomLeft', 'blindCurtainBottomRight', 'blindCurtainSliceBottom', 'blindCurtainSliceTop', 'stampede', 'mosaic', 'mosaicReverse', 'mosaicRandom', 'mosaicSpiral', 'mosaicSpiralReverse', 'topLeftBottomRight', 'bottomRightTopLeft', 'bottomLeftTopRight', 'bottomLeftTopRight'
  //you can also use more than one effect, just separate them with commas: 'simpleFade, scrollRight, scrollBottom'
  fx: 'random',

  // leave empty if you want to display the same effect on mobile devices and on desktop etc.
  mobileFx: '',

  // to make the grid blocks slower than the slices, this value must be smaller than transPeriod
  gridDifference: 250,

  // here you can type pixels (for instance '300px'), a percentage (relative to the width of the slideshow, for instance '50%') or 'auto'
  height: '50%',

  // the path to the image folder (it serves for the blank.gif, when you want to display videos)
  imagePath: 'images/',

  // true, false. Puase on state hover. Not available for mobile devices
  hover: true,

  // pie, bar, none (even if you choose "pie", old browsers like IE8- can't display it... they will display always a loading bar)
  loader: 'pie',
  loaderColor: '#eeeeee',
  loaderBgColor: '#222222',
  loaderOpacity: .8, //0, .1, .2, .3, .4, .5, .6, .7, .8, .9, 1
  loaderPadding: 2,
  loaderStroke: 7,
  pieDiameter: 38,
  piePosition: 'rightTop', //'rightTop', 'leftTop', 'leftBottom', 'rightBottom'

  // you can also leave it blank
  minHeight: '200px',

  // true or false, to display or not the navigation buttons
  navigation: true,

  // if true the navigation button (prev, next and play/stop buttons) will be visible on hover state only, if false they will be visible always
  navigationHover: true,

  // same as above, but only for mobile devices
  mobileNavHover: true,

  // true, false. Decide to apply a fade effect to blocks and slices: if your slideshow is fullscreen or simply big, I recommend to set it false to have a smoother effect
  opacityOnGrid: false,

  // a layer on the images to prevent the users grab them simply by clicking the right button of their mouse (.camera_overlayer)
  overlayer: true,

  // enable pagination
  pagination: true,

  // true or false, to display or not the play/pause buttons
  playPause: true,

  // true, false. It stops the slideshow when you click the sliders.
  pauseOnClick: true,

  // true, false. Select true if you don't want that your images are cropped
  portrait: false,

  // the number of rows
  rows: 4,

  // if 0 the same value of cols
  slicedCols: 12,

  // if 0 the same value of rows
  slicedRows: 8,

   // next, prev, random: decide if the transition effect will be applied to the current (prev) or the next slide
  slideOn: 'random',

  // shows thumbnails
  thumbnails: false,

  // milliseconds between the end of the sliding effect and the start of the nex one
  time: 7000,

  // lenght of the sliding effect in milliseconds
  transPeriod: 1500

});
5. Callback functions.
jQuery('#camera_wrap').camera({

  // invoked when the transition effect ends
  onEndTransition: function() {  },

  // invoked when the image on a slide has completely loaded
  onLoaded      : function() {  },

  // invoked when the image on a slide start loading
  onStartLoading    : function() {  },

  // invoked when the transition effect starts
  onStartTransition : function() {  }

});
Changelog:
2018-07-19
- DOC Update
This awesome jQuery plugin is developed by azhar47. For more Advanced Usages, please check the demo page or visit the official website.