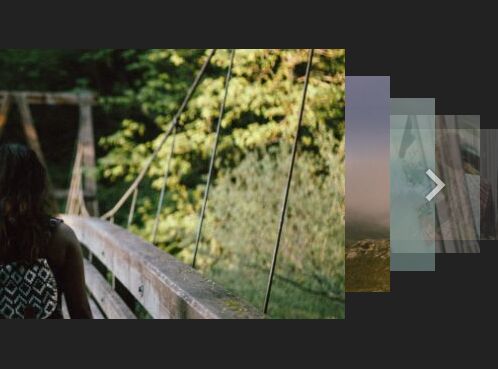
Creating A 3D Coverflow Slideshow with jQuery and CSS3
| File Size: | 3.73 KB |
|---|---|
| Views Total: | 12287 |
| Last Update: | |
| Publish Date: | |
| Official Website: | Go to website |
| License: | MIT |

An Apple-style coverflow slideshow which allows you to navigate through a series of slides by clicking the navigation buttons or an inactive cover. Made with jQuery and CSS3 transitions & transforms.
See also:
- jQuery Carousel Image Gallery with Cover-flow Effect - jqcarousel
- 3D Cover Flow-Style Image Carousel Plugin with jQuery - Cloud 9 Carousel
- Cover-flow Effect with Image Reflection Effect Using jQuery and jQuery UI - qpcoverflow
- Responsive Image Cover Flow Plugin with jQuery and CSS3 - flipster
How to use it:
1. Create next/prev controls to slide the coverflow slideshow.
<div class="controls">
  <div class="cbcontrol" id="cbControlRight">Prev</div>
  <div class="cbcontrol" id="cbControlLeft">Next</div>
  <div class="clear"></div>
</div>
2. Wrap the cover images into a container with CSS class of 'stage' as follows.
<div class="stage">
  <div class="cbImage"><img src="http://lorempixel.com/200/268/sports" alt="Alt" /></div>
  <div class="cbImage"><img src="http://lorempixel.com/200/268/people" alt="Alt" /></div>
  <div class="cbImage"><img src="http://lorempixel.com/200/268/fashion" alt="Alt" /></div>
  <div class="cbImage active"><img src="http://lorempixel.com/200/268/abstract" alt="Alt" /></div>
  <div class="cbImage"><img src="http://lorempixel.com/200/268/city" alt="Alt" /></div>
  <div class="cbImage"><img src="http://lorempixel.com/200/268/nightlife" alt="Alt" /></div>
  <div class="cbImage"><img src="http://lorempixel.com/200/268/cats" alt="Alt" /></div>
  <div class="cbImage"><img src="http://lorempixel.com/200/268/nature" alt="Alt" /></div>
  <div class="cbImage"><img src="http://lorempixel.com/200/268/food" alt="Alt" /></div>
  <div class="cbImage"><img src="http://lorempixel.com/200/268/transports" alt="Alt" /></div>
  <div class="cbImage"><img src="http://lorempixel.com/200/268/technics" alt="Alt" /></div>
  <div class="clear"></div>
</div>
3. The core CSS styles for the coverflow slideshow.
.clear { clear: both; }

.stage {
  background-color: #000000;
  float: left;
  height: 330px;
  overflow: hidden;
  width: 100%;
  max-width: 800px;
  z-index: 10;
  position: relative;
  -webkit-backface-visibility: hidden;
}

.cbImage {
  width: 200px;
  height: 268px;
  float: left;
  margin: 25px 0px 25px 0px;
  color: white;
  box-shadow: 0px 5px 10px 0px #D6D6D6;
  position: absolute;
  -webkit-transform-style: preserve-3d;
  transform-style: preserve-3d;
}

.cbImage img {
  width: 100%;
  height: 100%;
}

.inactiveLeft {
  -webkit-transform: perspective(500px) rotateY(60deg);
  -O-transform: perspective(500px) rotateY(60deg);
  transform: perspective(500px) rotateY(60deg);
  -webkit-transition: all .5s ease-out;
  -O-transition: all .5s ease-out;
  transition: all .5s ease-out;
  box-shadow: 12px 0px 20px 0px #d6d6d6;
}

.inactiveRight {
  -webkit-transform: perspective(500px) rotateY(-60deg);
  -O-transform: perspective(500px) rotateY(-60deg);
  transform: perspective(500px) rotateY(-60deg);
  -webkit-transition: all .5s ease-out;
  -O-transition: all .5s ease-out;
  transition: all .5s ease-out;
  box-shadow: -12px 0px 20px 0px #d6d6d6;
}

.active {
  z-index: 100;
  -webkit-transform: perspective(500px) rotateY(0deg);
  -O-transform: perspective(500px) rotateY(0deg);
  transform: perspective(500px) rotateY(0deg);
  -webkit-transition: all .5s ease-out;
  -O-transition: all .5s ease-out;
  transition: all .5s ease-out;
}
4. Include jQuery Javascript library and the jQuery coverflow slideshow plugin at the bottom of the document.
<script src="http://ajax.googleapis.com/ajax/libs/jquery/2.1.1/jquery.min.js"></script>
<script src="coverflow-slideshow.js"></script>
This awesome jQuery plugin is developed by ssantee. For more Advanced Usages, please check the demo page or visit the official website.