Amazing Presentation Framework With CSS3 - impress.js
| File Size: | 3.7 MB |
|---|---|
| Views Total: | 3968 |
| Last Update: | |
| Publish Date: | |
| Official Website: | Go to website |
| License: | MIT |

impress.js is an amazing Presentation framework for modern bowsers. Based on CSS3 transforms and transitions. It doesn't depend on any external stylesheets. It adds all of the styles it needs for the presentation to work.
See Also:
Basic usage:
1. Body element is used by impress.js to set some useful class names, that will allow you to detect the support and state of the presentation in CSS or other scripts.
- First very useful class name is `impress-not-supported`. This class means, that browser doesn't support features required by impress.js, so you should apply some fallback styles in your CSS. It's not necessary to add it manually on this element. If the script detects that browser is not good enough it will add this class, but keeping it in HTML means that users without JavaScript will also get fallback styles.
- When impress.js script detects that browser supports all required features, this class name will be removed.
- The class name on body element also depends on currently active presentation step. More details about it can be found later, when `hint` element is being described.
<body class="impress-not-supported">
2. Now that's the core element used by impress.js. That's the wrapper for your presentation steps. In this element all the impress.js magic happens. It doesn't have to be a `<div>`. Only `id` is important here as that's how the script find it.
- To change the duration of the transition between slides use `data-transition-duration="2000"` giving it a number of ms. It defaults to 1000 (1s).
- When authoring impress.js presentations, you should target some screen size, which you can define here. The default is 1024 x 768. You should write your CSS as if this is the screen size used for the presentation. When you present your presentation on a screen (or browser window) of different size, impress.js will automatically scale the presentation to fit the screen. The minimum and maximum limits to this scaling can also be defined here.
- You can also control the perspective with `data-perspective="500"` giving it a number of pixels. It defaults to 1000. You can set it to 0 if you don't want any 3D effects. If you are willing to change this value make sure you understand how CSS perspective works: https://developer.mozilla.org/en/CSS/perspective
<div id="impress"
  data-transition-duration="1000"
  data-width="1024"
  data-height="768"
  data-max-scale="3"
  data-min-scale="0"
  data-perspective="1000"
  data-autoplay="7">
  ... steps here ..
</div>
3. Define your steps.
- Each step of the presentation should be an element inside the `#impress` with a class name of `step`. These step elements are positioned, rotated and scaled by impress.js, and the 'camera' shows them on each step of the presentation.
- Positioning information is passed through data attributes.
- In the example below we only specify x and y position of the step element with `data-x="-1000"` and `data-y="-1500"` attributes. This means that **the center** of the element (yes, the center) will be positioned in point x = -1000px and y = -1500px of the presentation 'canvas'.
- It will not be rotated or scaled.
<div id="bored" class="step slide" data-x="-1000" data-y="-1500" data-autoplay="10">
  <q>Aren’t you just <b>bored</b> with all those slides-based presentations?</q>
</div>
4. This is an example of step element being scaled. Again, we use a `data-` attribute, this time it's `data-scale="4"`, so it means that this element will be 4 times larger than the others. From presentation and transitions point of view it means, that it will have to be scaled down (4 times) to make it back to its correct size.
<div id="title" class="step" data-x="0" data-y="0" data-scale="4">
  <span class="try">then you should try</span>
  <h1>impress.js<sup>*</sup></h1>
  <span class="footnote"><sup>*</sup> no rhyme intended</span>
</div>
5. This element introduces rotation. Notation shouldn't be a surprise. We use `data-rotate="90"` attribute, meaning that this element should be rotated by 90 degrees clockwise.
<div id="its" class="step" data-x="850" data-y="3000" data-rotate="90" data-scale="5">
  <p>It’s a <strong>presentation tool</strong> <br/>
  inspired by the idea behind <a href="http://prezi.com">prezi.com</a> <br/>
  and based on the <strong>power of CSS3 transforms and transitions</strong> in modern browsers.</p>
</div>

<div id="big" class="step" data-x="3500" data-y="2100" data-rotate="180" data-scale="6">
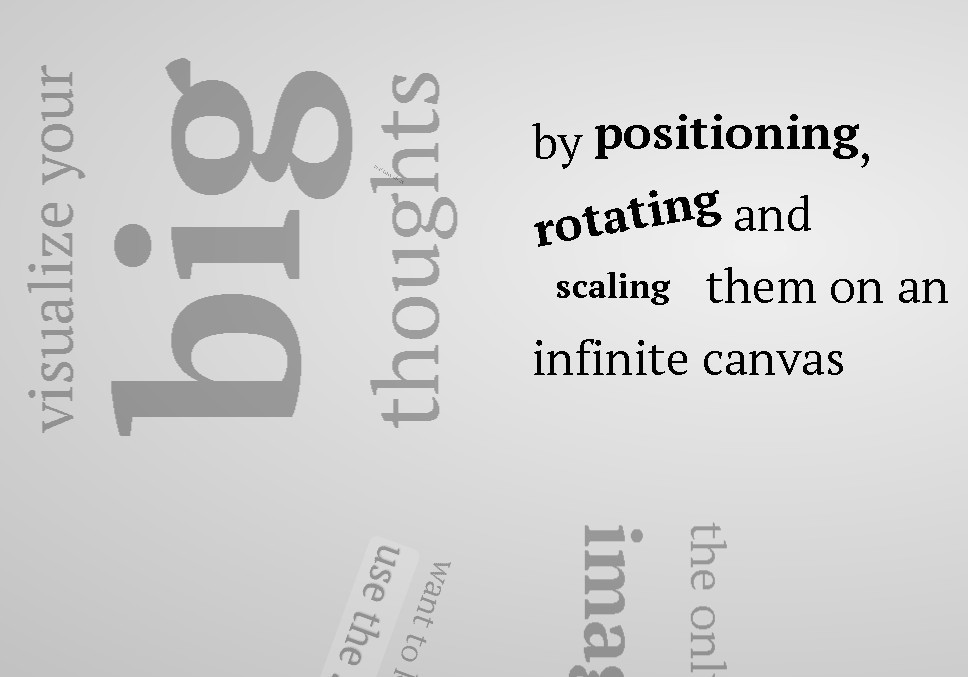
  <p>visualize your <b>big</b> <span class="thoughts">thoughts</span></p>
</div>
6. Along with `data-x` and `data-y`, you can define the position on third (Z) axis, with `data-z`. In the example below we use `data-z="-3000"` meaning that element should be positioned far away from us (by 3000px).
<div id="tiny" class="step" data-x="2825" data-y="2325" data-z="-3000" data-rotate="300" data-scale="1">
  <p>and <b>tiny</b> ideas</p>
</div>
7. You can not only position element in 3D, but also rotate it around any axis. So this one here will get rotated by -40 degrees (40 degrees anticlockwise) around X axis and 10 degrees (clockwise) around Y axis. You can of course rotate it around Z axis with `data-rotate-z` - it has exactly the same effect as `data-rotate` (these two are basically aliases).
<div id="tiny" class="step" data-x="2825" data-y="2325" data-z="-3000" data-rotate="300" data-scale="1">
  <p>and <b>tiny</b> ideas</p>
</div>
8. This is a UI plugin. You can read more about plugins in src/plugins/README.md.
<div id="impress-toolbar"></div>
9. To make all described above really work, you need to include impress.js in the page. You also need to call a `impress().init()` function to initialize impress.js presentation.
<script src="js/impress.js"></script>
<script>impress().init();</script>
10. The `impress()` function also gives you access to the API that controls the presentation.
// initializes the presentation,
api.init();

// moves to next step of the presentation
api.next();

// moves to previous step of the presentation
api.prev();

// moves the presentation to the step given by its index number
api.goto(stepIndex | stepElementId | stepElement, [duration]);
Changelog:
v2.0.0 (08/01/2022)
- The default target resolution used inside impress.js code for various layout and transformations, is now 1920x1080 (Full HD). In addition the max scale factor by default is now 3 x the default, meaning for larger resolutions, impress.js will stretch the slide contents to fill the available screen.
- The Rel plugin now supports relative coordinates also for rotations. This means you can now define all coordinates relative to the previous step position and rotation. Huge thank you to new contributor Thawk for this amazing piece of math.
- Fixes to defining coordinates with relative-to-screen-size units (h and w).
- Use element attribute title, if available, in the navigation-ui drop box
- Support custom ordering for substeps
This awesome jQuery plugin is developed by impress. For more Advanced Usages, please check the demo page or visit the official website.


