Responsive Touch Swiper Slider - jquery.slider.js
| File Size: | 37.5 KB |
|---|---|
| Views Total: | 3897 |
| Last Update: | |
| Publish Date: | |
| Official Website: | Go to website |
| License: | MIT |
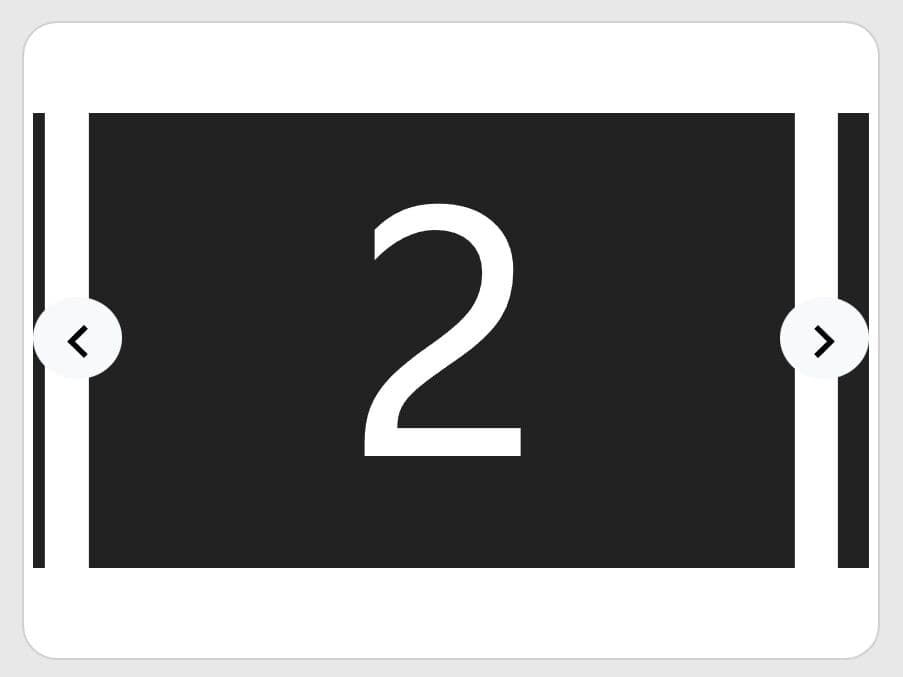
A flexible, responsive, mobile-friendly, and highly customizable swiper/slider/carousel/slideshow plugin created for both desktop and mobile.
Features:
- Supports touch and drag events.
- Slide and fade animations.
- Custom transition effects using CSS.
- Auto play.
- Infinite loop.
- Arrow navigation and numeric pagination.
- Easy to style using your own CSS styles.
How to use it:
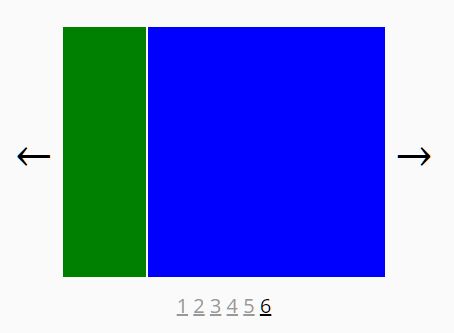
1. The basic HTML structure for the swiper slider.
<div class="slider">
  <div class="slider-container" id="slider">
    <div class="slider-item">Item 1</div>
    <div class="slider-item">Item 2</div>
    <div class="slider-item">Item 3</div>
    <div class="slider-item">Item 4</div>
    <div class="slider-item">Item 5</div>
  </div>
</div>
2. Place the jquery.slider.js script after jQuery library.
<script src="jquery.js"></script>
<script src="jquery.slider.js"></script>
3. Attach the plugin to the slider container and done.
$('#slider').slider();
4. The example CSS to style the slider.
.slider {
  display: flex;
  align-items: center;
  flex-wrap: wrap;
  width: 60%;
  margin: 0 auto;
}

.slider-container {
  flex-grow: 1;
  overflow: hidden;
  position: relative;
  height: 200px;
}
.slider-item {
  position: absolute;
  left: 0;
  top: 0;
  width: 100%;
  height: 100%;
}

@media (max-width: 768px) {
  .slider {
    width: 100%;
  }
}
4. Add custom navigation arrows to the slider.
<a href="#" class="slider-prev">←</a>
<a href="#" class="slider-next">→</a>
$('#slider').slider({
  prev: $('.slider-prev'),
  next: $('.slider-next')
});
5. Add a numeric pagination to the slider.
<div class="slider-pagination">
  <a href="#" class="slider-link">1</a>
  <a href="#" class="slider-link">2</a>
  <a href="#" class="slider-link">3</a>
  <a href="#" class="slider-link">4</a>
  <a href="#" class="slider-link">5</a>
</div>
$('#slider').slider({
  links: $('.slider-link')
});
6. Enable the autoplay functionality.
$('#slider').slider({
  autoPlay: true,
  delay: 5000 // interval
});
7. Set the transition effect. Default: 'slide'.
$('#slider').slider({
  effect: 'fade',
});
8. You can also create your own transition effects as follows:
$('#slider').slider({
  effect: 'myeffect',
  effects: {
    myeffect: {
        oldSlideCSS: function(oldIdx, newIdx, ratio) {
            return {
                left: 0,
                top: 0,
                opacity: 1,
                zIndex: 1
            };
        },
        newSlideCSS: function(oldIdx, newIdx, ratio) {
            var coef = (oldIdx < newIdx) ? 1 : -1;
            if (this.opt.loop) {
                if (oldIdx === 0 && newIdx === this.count - 1) {
                    coef = -1;
                } else if (oldIdx === this.count - 1 && newIdx === 0) {
                    coef = 1;
                }
            }
            return {
                left: (coef * (1 - ratio) * 100) + '%',
                top: (coef * (1 - ratio) * 100) + '%',
                opacity: ratio,
                zIndex: 2
            };
        },
        resetSlideCSS() {
            return {
                left: '',
                top: '',
                opacity: '',
                zIndex: ''
            };
        }
    }
  }
});
9. Full slider customization options with default values.
$('#slider').slider({
  container: null,
  items: null,
  prev: null,
  next: null,
  links: null,
  idx: 0,
  vertical: false, // vertical mode
  duration: 300,
  loop: true,
  autoPlay: false,
  delay: 5000,
  useSwipe: true, // enable/disable touch swipe
  swipeChangeOn: 0.5,
  swipeRatio(ratioX, ratioY) {
    return this.opt.vertical ? ratioY : ratioX;
  },
  activeClass: 'is-active',
  disabledClass: 'is-disabled',
  hideArrows: false,
  hideLinks: false,
  effect: 'slide',
  effects: {
    slide: {
      oldSlideCSS(oldIdx, newIdx, ratio) {
          let coef = (((oldIdx < newIdx) && !(this.opt.loop && oldIdx === 0 && newIdx === this.count - 1)) || (this.opt.loop && oldIdx === this.count - 1 && newIdx === 0)) ? -1 : 1;
          return this.opt.vertical ? { top: (coef * ratio * 100) + '%' } : { left: (coef * ratio * 100) + '%' };
      },
      newSlideCSS(oldIdx, newIdx, ratio) {
          let coef = (((oldIdx < newIdx) && !(this.opt.loop && oldIdx === 0 && newIdx === this.count - 1)) || (this.opt.loop && oldIdx === this.count - 1 && newIdx === 0)) ? 1 : -1;
          return this.opt.vertical ? { top: (coef * (1 - ratio) * 100) + '%' } : { left: (coef * (1 - ratio) * 100) + '%' };
      },
      resetSlideCSS() {
          return this.opt.vertical ? { top: '' } : { left: '' };
      }
    },
    fade: {
      oldSlideCSS(oldIdx, newIdx, ratio) {
          return { opacity: 1 - ratio, zIndex: 1 };
      },
      newSlideCSS(oldIdx, newIdx, ratio) {
          return { opacity: ratio, zIndex: 2 };
      },
      resetSlideCSS() {
          return { opacity: '', zIndex: '' };
      }
    }
  }
});
10. Event handlers.
$('#slider').slider({

  beforeChange: function(oldIdx, newIdx) {
    console.log('beforeChange', oldIdx, newIdx);
  },
  afterChange: function(oldIdx, newIdx) {
    console.log('afterChange', oldIdx, newIdx);
  },
  duringChange: function(oldIdx, newIdx, ratio) {
    console.log('duringChange', oldIdx, newIdx, ratio);
  }

});
11. API methods.
// Back to the previous slide
$('#slider').slider('showPrev');

// Go to the previous slide
$('#slider').slider('showNext');

// Go to a specific slide
$('#slider').slider('show', prompt('Slide index'));

// Start autoplay
$('#slider').slider('start');

// Stop autoplay
$('#slider').slider('stop');

// Return the number of slides
$('#slider').slider('count');

// Destroy the slider instance
$('#slider').slider('destroy');
Changelog:
2019-11-18
- Added Vertical mode.
This awesome jQuery plugin is developed by nikitanickzhukov. For more Advanced Usages, please check the demo page or visit the official website.