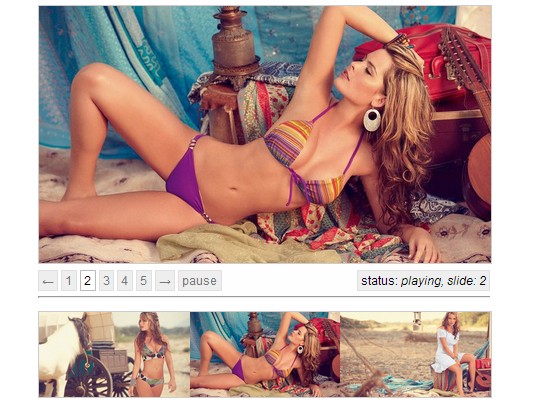
jQuery Responsive Slideshow with Thumbnails Navigation
| File Size: | 602 KB |
|---|---|
| Views Total: | 5138 |
| Last Update: | |
| Publish Date: | |
| Official Website: | Go to website |
| License: | MIT |

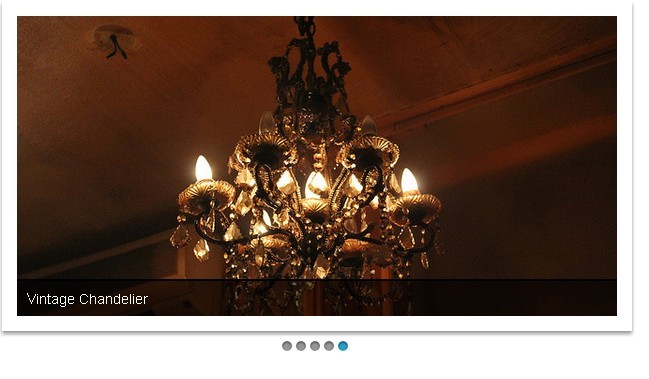
A jQuery & CSS3 based responsive slideshow/carousel/gallery plugin that features thumbnails/arrows navigation, auto playback and image crossfade effects.
How to use it:
1. Include jQuery Javascript library and the gallary.js script in the web page.
<script src="//code.jquery.com/jquery-1.11.1.min.js"></script>
<script src="gallary.js"></script>
2. Add a list of images with thumbnails and controls into your web page.
<div id="photo_container">
  <!-- #thumbnail -->
  <ul id="thumbnail">
    <li><a href="image/1.jpg"><img src="image/thumb/1.jpg" alt="photo1"></a></li>
    <li><a href="image/2.jpg"><img src="image/thumb/2.jpg" alt="photo2"></a></li>
    <li><a href="image/3.jpg"><img src="image/thumb/3.jpg" alt="photo3"></a></li>
    ...
  </ul>
  <!-- /#thumbnail -->

  <!-- #main_photo -->
  <div id="main_photo">
    <div class="img_nav">
      <btn id="next"></btn>
      <btn id="prev"></btn>
    </div>
    <div class="ctr_btn">
      <btn id="play_btn">Play</btn>
      <btn id="stop_btn">Stop</btn>
    </div>
  </div>
  <!-- /#main_photo -->

</div>
3. Add the following CSS/CSS3 snippets for basic styles.
#photo_container { position: relative; }

#thumbnail {
  overflow: hidden;
  margin: 0 0 10px;
  padding: 0 3%;
  width: 100%;
}

#thumbnail li {
  float: left;
  margin-right: 5px;
  margin-bottom: 5px;
  list-style: none;
}

#thumbnail li:last-child { margin-right: 0; }

#thumbnail li img {
  width: 100%;
  opacity: 0.5;
  filter: alpha(opacity=50);
}

#thumbnail li.current img {
  opacity: 1;
  filter: alpha(opacity=100);
}

#main_photo {
  position: relative;
  height: 490px;
  border: solid 15px #fff;
  box-shadow: 0 1px 8px #bbb;
}

#main_photo img {
  position: absolute;
  top: 0;
  width: 100%;
}

.img_nav btn {
  position: absolute;
  top: 52%;
  margin: -25px 6% 0;
  width: 50px;
  height: 50px;
  border-top: solid 2px #fff;
  border-left: solid 2px #fff;
  cursor: pointer;
}

#prev {
  -ms-transform: rotateX(-45deg);
  -webkit-transform: rotate(-45deg);
  transform: rotate(-45deg);
}

#next {
  right: 0;
  -ms-transform: rotateX(135deg);
  -webkit-transform: rotate(135deg);
  transform: rotate(135deg);
}

.ctr_btn {
  position: absolute;
  top: 7%;
  right: 5%;
}

.ctr_btn btn {
  padding: 10px 20px;
  border: solid 2px #fff;
  color: #fff;
  cursor: pointer;
}
4. That's it. You can customize the responsive slideshow via options array.
var options = {

  // thumbnail container
  thumbUl : $('#thumbnail'),

  // slideshow container
  mainPhoto : $('#main_photo'),

  // parent container
  parentDiv : $('#photo_container'),

  // slide animation speed
  slideSpeed: 3000,

  // crossfade animation seepd
  fadeSpeed: 500,

  // auto play
  startPlay: true,

  // maximum width of the slideshow
  maxWidth : 520,

  // maximum width of the thumbnails
  thumbMaxWidth : 80,

  // minimum width of the thumbnails.
  thumbMinWidth : 65

};
This awesome jQuery plugin is developed by SaoriMiyazaki. For more Advanced Usages, please check the demo page or visit the official website.