Basic WYSIWYG Text Editor For jQuery - WYSIWYG.JS
| File Size: | 9.92 KB |
|---|---|
| Views Total: | 6233 |
| Last Update: | |
| Publish Date: | |
| Official Website: | Go to website |
| License: | MIT |
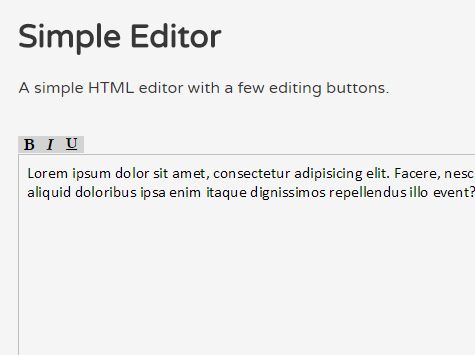
The jQuery WYSIWYG.JS plugin generates a simple, easy-to-customize WYSIWYG text editor with custom controls for your textarea element.
How to use it:
1. First you need to load both jQuery library and the jQuery WYSIWYG.js plugin in the html document.
<script src="//code.jquery.com/jquery.min.js"></script>
<script src="src/wysiwyg.js"></script>
2. Create the editor controls for your textarea element
<button class="bold">Bold</button>
<button class="italic">Italic</button>
<button class="underline">Underline</button>
<button class="orderedList">Ordered List</button>
<button class="unOrderedList">Unordered List</button>
<button class="right">Right Text</button>
<button class="left">Left Text</button>
<button class="center">Center Text</button>
<button class="full">Justify Full</button>
<button class="rule">Horizontal Rule</button>
<button class="sub">Subscript</button>
<button class="super">Superscript</button>
<button class="strike">Strikethrough</button>
<button class="remove">Remove Formating</button>
<button class="indent">Indent</button>
<button class="outdent">Outdent</button>
<button class="select">Select All</button>
<button class="unlink">Unlink</button>
<button class="undo">Undo</button>
<button class="redo">Redo</button>
<button class="html">HTML</button>
<button class="raw">Raw HTML</button>
<select id="fonty">
  <option disabled="true" selected="true">Select a font</option>
  <option value="ebrima">Ebrima</option>
  <option value="arial">Arial</option>
  <option value="georgia">Georgia</option>
</select>
<select id="sizy">
  <option value="1">1</option>
  <option value="2">2</option>
  <option value="3">3</option>
  <option value="4">4</option>
  <option value="5">5</option>
  <option value="6">6</option>
  <option value="7">7</option>
</select>
<input type="text" id="colory" placeholder="Font Color">
<input type="text" id="linky" placeholder="Enter Link URL">
<input type="url" id="imagey" placeholder="Enter Image URL">
<input type="url" id="codey" placeholder="Enter HTML code">
<button class="demo-btn">Custom Functions</button>
<button class="code">Insert Code Block</button>
<textarea id="wysiwyg" cols="30" rows="10"></textarea>
<pre class="rawHTML"></pre>
3. The JavaScript to activate the WYSIWYG editor.
var options = {
    controls: {
      bold: $(".bold"),
      italic: $(".italic"),
      underline: $(".underline"),
      orderedList: $(".orderedList"),
      unOrderedList: $(".unOrderedList"),
      justifyCenter: $(".center"),
      justifyRight: $(".right"),
      justifyLeft: $(".left"),
      justifyFull: $(".full"),
      insertHorizontalRule: $(".rule"),
      subscript: $(".sub"),
      superscript: $(".super"),
      strikeThrough: $(".strike"),
      removeFormat: $(".remove"),
      selectAll: $(".select"),
      indent: $(".indent"),
      outdent: $(".outdent"),
      unlink: $(".unlink"),
      undo: $(".undo"),
      redo: $(".redo")
    },
    inputControls: {
      fontName: $("#fonty"),
      createLink: $("#linky"),
      fontSize: $("#sizy"),
      fontColor: $("#colory"),
      insertImage: $("#imagey"),
      insertHTML: $("#codey")
    },
    defaults: {
      fontFamily: "georgia",
      border: "1px solid lightgrey",
    },
    size : {
      height: "350px",
      width: "100%",
    },
    css : {
      "background": "#eee"
    }

};

var instance = $("textarea#wysiwyg").wysiwyg( options );

$(".demo-btn").click(function(){
  instance.doAction("bold");
});

$(".html").click(function(){
  $("body").append(instance.html());
});

$(".raw").click(function(){
  $(".rawHTML").html(instance.rawHTML());
});

$(".code").click(function(){
  instance.doAction("insertHTML", "<pre><code>function awesome(){};</code></pre>");
});
This awesome jQuery plugin is developed by iamfaiz. For more Advanced Usages, please check the demo page or visit the official website.
