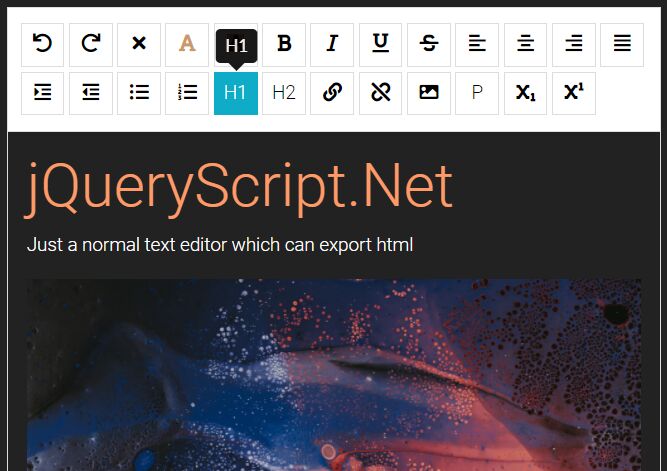
Basic WYSIWYG HTML Editor With jQuery
| File Size: | 3.62 KB |
|---|---|
| Views Total: | 5358 |
| Last Update: | |
| Publish Date: | |
| Official Website: | Go to website |
| License: | MIT |

This is a small jQuery script that makes use of contentEditable and document.execCommand API to create a responsive, TinyMCE style WYSIWYG HTML Editor for editable web content.
How to use it:
1. Include Font Awesome Iconic Font for the editor icons.
<link rel="stylesheet" href="https://netdna.bootstrapcdn.com/font-awesome/4.7.0/css/font-awesome.min.css">
2. Create the editor for the editable web content.
<div class="editor">
  <button data-action="bold" title="Bold"><i class="fa fa-bold"></i></button>
  <button data-action="italic" title="Italic"><i class="fa fa-italic"></i></button>
  <button data-action="underline" title="Underline"><i class="fa fa-underline"></i></button>
  <div class="divider"></div>
  <button data-action="justifyLeft" title="Align Left"><i class="fa fa-align-left"></i></button>
  <button data-action="justifyCenter" title="Align Center"><i class="fa fa-align-center"></i></button>
  <button data-action="justifyRight" title="Align Right"><i class="fa fa-align-right"></i></button>
  <button data-action="justifyFull" title="Justify"><i class="fa fa-align-justify"></i></button>
  <div class="divider"></div>
  <button data-action="insertUnorderedList" title="Bullet List"><i class="fa fa-list-ul"></i></button>
  <button data-action="insertOrderedList" title="Numbered List"><i class="fa fa-list-ol"></i></button>
  <div class="divider"></div>
  <select title="Font Family" data-action="fontName">
    <option selected="selected" disabled="disabled">Font Family</option>
    <option value="arial">Arial</option>
    <option value="sans-serif">Sans Serif</option>
    <option value="georgia">Georgia   </option>
    <option value="impact">Impact</option>
    <option value="roboto">Roboto</option>
    <option value="verdana">Verdana</option>
  </select>
  <select title="Font Size" data-action="fontSize">
    <option value="1">10px</option>
    <option value="2">12px</option>
    <option value="3">14px</option>
    <option value="4">16px</option>
    <option value="5">18px</option>
    <option value="6">21px</option>
    <option value="7">26px</option>
  </select>
  <select title="Format" data-action="formatBlock">
    <option selected="selected" disabled="disabled">Formatting</option>
    <option value="h1">Heading 1</option>
    <option value="h2">Heading 2</option>
    <option value="h3">Heading 3</option>
    <option value="p">Paragraph</option>
  </select>
  <div class="divider"></div>
  <button data-action="createLink" title="Insert Link"><i class="fa fa-link"></i></button>
  <button data-action="insertImage" title="Insert Image"><i class="fa fa-image"></i></button>
  <button data-action="insertHorizontalRule" title="Insert Horizontal Rule">-</button>
  <div class="divider"></div>
  <button data-action="undo" title="Undo"><i class="fa fa-undo"></i></button>
  <button data-action="redo" title="Redo"><i class="fa fa-repeat"></i></button>
  <button data-action="removeFormat" title="Remove Formatting"><i class="fa fa-eraser"></i></button>
  <button data-action="delete" title="Delete"><i class="fa fa-trash"></i></button>
</div>
<div id="document" contenteditable="true">
  ...
</div>
3. The required CSS for the editor.
#document {
  margin: 25px 0;
  padding: 10px;
  font-size: 15px;
  line-height: 1.4;
  border-radius: 5px;
  border: 2px solid transparent;
  outline: none;
}

#document:hover, #document:focus { border-color: rgba(0, 0, 255, 0.4); }

#document li { margin-bottom: 10px; }

#document p img {
  float: left;
  max-width: 250px;
  width: 100%;
  height: auto;
  margin: 5px 5px 5px 0;
}

#document p img.right {
  float: right;
  margin: 5px 0 5px 5px;
}

font[size='1'] { font-size: 10px; }

font[size='2'] { font-size: 12px; }

font[size='3'] { font-size: 14px; }

font[size='4'] { font-size: 16px; }

font[size='5'] { font-size: 18px; }

font[size='6'] { font-size: 21px; }

font[size='7'] { font-size: 26px; }

.editor {
  border: 1px solid #999;
  border-radius: 5px;
  padding: 10px;
  background: #eee;
}

.editor .hide { display: none; }

.editor .divider {
  margin: 0 4px;
  display: inline-block;
}

.editor .divider:after {
  content: "|";
  color: #666;
}

.editor button {
  width: 25px;
  text-transform: uppercase;
  font-weight: 700;
}

.editor button[data-action='italic'] { font-style: italic; }

.editor button[data-action='underline'] { text-decoration: underline; }

.editor button:hover {
  background: #ccc;
  color: #fff;
}

.editor button, .editor select {
  background: #fff;
  border: 1px solid #666;
  border-radius: 5px;
  height: 25px;
  margin: 5px 2px;
}

.editor button:hover, .editor select:hover { cursor: pointer; }

.context-menu {
  background: #fff;
  position: absolute;
  top: 0;
  left: 50%;
  padding: 15px;
  border: 1px solid #333;
}
4. The main JavaScript (jQuery script) for the editor. Copy the JavaScript snippets as shown below and insert them after jQuery JavaScript library and done.
<script src="https://code.jquery.com/jquery-3.2.1.slim.min.js"
        integrity="sha384-KJ3o2DKtIkvYIK3UENzmM7KCkRr/rE9/Qpg6aAZGJwFDMVNA/GpGFF93hXpG5KkN"
        crossorigin="anonymous">
</script>
// Font Style
$('button').on('click', function(e) {
  var $this = $(this),
      action = $this.data("action");

  var aShowDefaultUI = false, aValueArgument = null;
  if($this.data('show-default-ui'))
    aShowDefaultUI = $this.data('show-default-ui');

  if($this.data('value-args'))
    aValueArgument = $this.data('value-args');

  if($this.data('action') == 'createLink')
    aValueArgument = prompt("Please specify URL (including http protocol)", 'http://www.');

  if($this.data('action') == 'insertImage')
    aValueArgument = prompt("Please specify Image URL (including http protocol)", 'http://www.');

  document.execCommand(action, aShowDefaultUI, aValueArgument);
});


// Font Formatting Selects
$('select').on('change', function() {
  var $this = $(this),
      action = $this.data("action"),
      aValueArgument = $this.val(),
      aShowDefaultUI = false;

  if($this.data('show-default-ui'))
    aShowDefaultUI = $this.data('show-default-ui');

  document.execCommand(action, aShowDefaultUI, aValueArgument);
});


// Image handling
$('img').on('click', function() {
  var $this = $(this);
  $this.toggleClass('right');
});
This awesome jQuery plugin is developed by Amanda Ashley. For more Advanced Usages, please check the demo page or visit the official website.