jQuery Plugin For Product Demo Bar - Switcheroo
| File Size: | 67.6 KB |
|---|---|
| Views Total: | 3826 |
| Last Update: | |
| Publish Date: | |
| Official Website: | Go to website |
| License: | MIT |
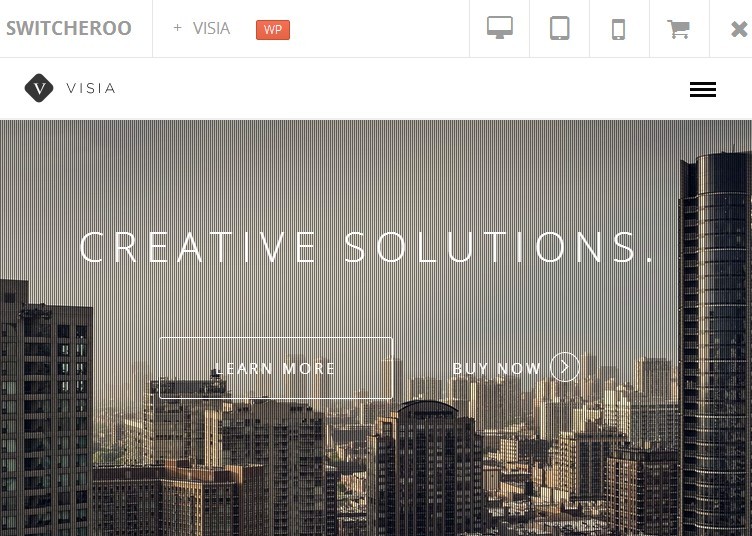
Switcheroo is a jQuery plugin that creates a responsive demo bar at the top of your page to showcase how your products (websites, themes, Apps) work on different devices/resolutions.
How to use it:
1. Include necessary CSS files in the head section of your page.
<link href="css/template.min.css" rel="stylesheet" media="screen">
<link href="http://netdna.bootstrapcdn.com/font-awesome/3.2.1/css/font-awesome.css" rel="stylesheet">
2. Include the jQuery javascript library and jQuery switcheroo plugin at the end of your page.
<script src="http://ajax.googleapis.com/ajax/libs/jquery/1.11.0/jquery.min.js"></script>
<script src="js/application.min.js"></script>
3. Create the Html for a demo bar.
<header class="switcher-bar clearfix">

<!-- Logo -->
<div class="logo textual pull-left"> <a href="#" title="Switcher"> Switcheroo </a> </div>

<!-- Product Switcher -->
<div class="product-switcher pull-left"> <a href="#" title="Select a Product"> Select a Product <span>+</span> </a> </div>

<!-- Bar Remove Button -->
<div class="remove-btn header-btn pull-right"> <a href="#" title="Close this bar" class="icon-remove"></a> </div>

<!-- Purchase Button -->
<div class="purchase-btn header-btn pull-right"> <a href="#" title="Purchase" class="icon-shopping-cart"></a> </div>

<!-- Mobile Button -->
<div class="mobile-btn header-btn pull-right hidden-xs"> <a href="#" title="Smartphone View" class="icon-mobile-phone"></a> </div>

<!-- Tablet Button -->
<div class="tablet-btn header-btn pull-right hidden-xs"> <a href="#" title="Tablet View" class="icon-tablet"></a> </div>

<!-- Desktop Button -->
<div class="desktop-btn header-btn pull-right hidden-xs"> <a href="#" title="Desktop View" class="icon-desktop"></a> </div>
</header>
4. Create a product list.
<section class="switcher-body"> <a href="#" title="Prev" class="icon-chevron-left products-prev"></a>
<div class="products-wrapper">
<div class="products-list clearfix"> </div>
</div>
<a href="#" title="Next" class="icon-chevron-right products-next"></a> </section>
5. Create an iframe to showcase your products.
<iframe class="product-iframe" frameborder="0" border="0"></iframe>
6. Create a preloader for the plugin.
<div class="preloader"></div>
<div class="preloading-icon"><i class="icon-bolt"></i></div>
7. Add and edit your products in the javascript.
var $products,
$current_product = 'visia';

$products = {

visia : {
name     : 'Product 1',
tag      : 'WP',
img      : '1.jpg',
url      : 'http://www.xxx.com',
purchase : 'http://purchage.xxx.com',
tooltip  : 'Optional Tooltip'
},


neo_wp : {
name     : 'Product 2',
tag      : 'WP',
img      : '2.jpg',
url      : 'http://www.xxx.com',
purchase : 'http://purchage.xxx.com',
tooltip  : 'Optional Tooltip'
}

};
This awesome jQuery plugin is developed by OriginalEXE. For more Advanced Usages, please check the demo page or visit the official website.