Tiny Flexible jQuery Pagination Plugin - MXPage.js
| File Size: | 6.85 KB |
|---|---|
| Views Total: | 1366 |
| Last Update: | |
| Publish Date: | |
| Official Website: | Go to website |
| License: | MIT |
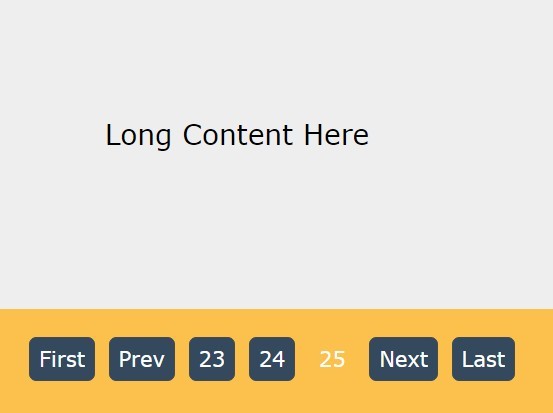
MXPage.js is a really simple jQuery plugin used to generate a customizable and styleable pagination component for your long page content.
How to use it:
1. Create an empty element that will be served as the container for your pagination component.
<div class="container"></div>
2. Place jQuery library and the jQuery MXPage.js script at the end of the html document.
<script src="//code.jquery.com/jquery-1.11.3.min.js"></script>
<script src="jquery.mxpage.min.js"></script>
3. Initialize the plugin to generate pagination links inside the container you just created.
$('.container').mxpage();
4. Apply you own CSS styles to the pagination links.
.mxpage-container { display: block; }

.mxpage-container li { display: inline-block; }

.mxpage {
  display: inline-block;
  min-width: 15px;
  padding: 0 5px 0 5px;
  height: 24px;
  color: #222;
  font-size: 12px;
  line-height: 24px;
  text-align: center;
  border-radius: 4px;
  background-color: #fff;
  border: solid 1px #ddd;
  margin-left: 4px;
  margin-right: 4px;
  transition: .2s all;
  text-decoration: none;
}

.mxpage:hover {
  background: #dedede;
  color: #666;
  border: 1px solid #dedede;
}

.mxpage.active, .mxpage.active:hover {
  background-color: transparent;
  border-color: transparent;
}
5. Config the pagination component.
// maximum page links to display
perPage: 10,

// current page
currentPage: 1,

// maximum pages
maxPage: 1,

// text for prev button
previousText: 'previous',

// text for next button
nextText: 'next',

// text for first page
frontPageText: 'front page',

// text for last page
lastPageText: 'last page',

// onClick callback function
click: function (index, $element) {}
This awesome jQuery plugin is developed by Hermit-beta. For more Advanced Usages, please check the demo page or visit the official website.