Auto Pass CSS Breakpoints To JavaScript - js.device.selector
| File Size: | 741 KB |
|---|---|
| Views Total: | 666 |
| Last Update: | |
| Publish Date: | |
| Official Website: | Go to website |
| License: | MIT |
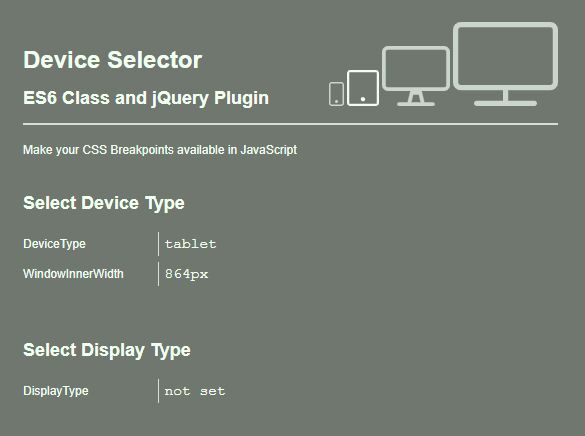
js.device.selector is a JavaScript plugin that detects the device/display type (mobile, tablet, desktop, large-desktop, retina) of a browser and automatically passes the breakpoints defined in the CSS to the JavaScript.
See also:
How to use it:
1. Include the minified version of the js.device.selector plugin after jQuery.
<script src="/path/to/jquery.js"></script>
<script src="/path/to/jquery.device.selector.js"></script>
2. Create the HTML for the device selector.
<div data-device-selector>
  <div data-device-selector-item data-device-selector-devicetype="mobile"></div>
  <div data-device-selector-item data-device-selector-devicetype="tablet"></div>
  <div data-device-selector-item data-device-selector-devicetype="desktop"></div>
  <div data-device-selector-item data-device-selector-devicetype="large-desktop"></div>
  <div data-device-selector-item data-device-selector-displaytype="retina"></div>
</div>
3. Define the breakpoints in the CSS media queries.
[data-device-selector-item] {
  display: none;
}

@media
only screen and (max-width: 768px) {
  [data-device-selector-devicetype="mobile"] {
    display: block !important;
  }
}

@media
only screen and (min-width: 769px) and (max-width: 960px) {
  [data-device-selector-devicetype="tablet"] {
    display: block !important;
  }
}

@media
only screen and (min-width: 961px) and (max-width: 1200px) {
  [data-device-selector-devicetype="desktop"] {
    display: block !important;
  }
}

@media
only screen and (min-width: 1201px) {
  [data-device-selector-devicetype="large-desktop"] {
    display: block !important;
  }
}

@media
only screen and (-webkit-min-device-pixel-ratio: 2),
only screen and (   min--moz-device-pixel-ratio: 2),
only screen and (     -o-min-device-pixel-ratio: 2/1),
only screen and (        min-device-pixel-ratio: 2),
only screen and (                min-resolution: 192dpi),
only screen and (                min-resolution: 2dppx) {
  [data-device-selector-displaytype="retina"] {
    display: block !important;
  }
}
4. Initailize the js.device.selector plugin.
$.fn.deviceSelector();
5. Get the current device type: mobile || tablet || desktop || large-desktop.
console.log($.fn.deviceSelector.getDeviceType());
6. Get the current display type: retina || undefined.
console.log($.fn.deviceSelector.getDisplayType());
7. The DeviceSelector options.
- selector: The DeviceSelector selector options.
- selector.name: The DeviceSelector selector name for initialisation.
- selector.items: The DeviceSelector selector items for initialisation.
- selector.items.name: The DeviceSelector selector items name for initialisation.
- selector.parent: The DeviceSelector selector parent for initialisation.
- selector.parent.name: The DeviceSelector selector parent name for initialisation.
- device: The DeviceSelector device type options.
- device.selector: The DeviceSelector device type selector for initialisation.
- device.selector.name: The DeviceSelector device type selector name for initialisation.
- display: The DeviceSelector display type options.
- display.selector: The DeviceSelector display type selector for initialisation.
- display.selector.name: The DeviceSelector display type selector name for initialisation.
$.fn.deviceSelector({
  "selector": {
    "name": ".namespace__m-device-selector",
    "parent": {
      "name": ".namespace",
    },
    "items": {
      "name": ".namespace__m-device-selector__item",
    },
  },
  "device": {
    "selector": {
      "name": "data-ds-devicetype",
    },
  },
  "display": {
    "selector": {
      "name": "data-ds-displaytype",
    },
  },
});
8. The js.device.selector can also be used as an ES6 module.
# NPM
$ npm install js.device.selector --save
import DeviceSelector from 'js.device.selector';
const deviceSelector = new DeviceSelector({
      // optione here
});

console.log(deviceSelector.deviceType());
console.log(deviceSelector.displayType());
Changelog:
v1.0.1 (2019-03-14)
- refactor es6 module
- refactor build, tests and coverage
This awesome jQuery plugin is developed by exiguus. For more Advanced Usages, please check the demo page or visit the official website.