Nice and Highly Configurable jQuery Slideshow Plugin - Camera
| File Size: | Unknown |
|---|---|
| Views Total: | 25002 |
| Last Update: | |
| Publish Date: | |
| Official Website: | Go to website |
| License: | MIT |
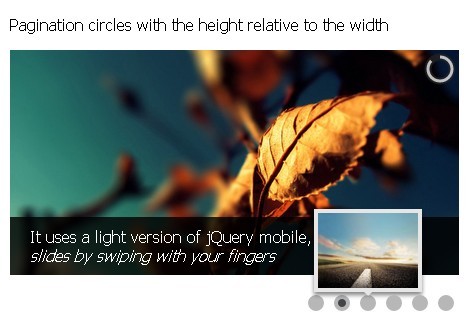
Camera is a powerful and highly customizable jQuery plugin for creating responsive and touch-friendly slideshows with a lot of options and animation effects. It uses a light version of jQuery mobile, you can navigate the slides by swiping with your fingers.
Features:
- Responsive and adaptive
- 30+ skins
- Supports jQuery easing and jQuery Mobile
- Auto play
- Awesome transition effects
- Supports captions, HTML elements and videos, not only images
- Thumbnails preview
- Fullscreen slideshow
Basic Usage:
1. Include jQuery library and jQuery mobile library in the head section
<script type='text/javascript' src='jquery.min.js'></script>
<script type='text/javascript' src='jquery.mobile.customized.min.js'></script>
2. Include jQuery easing and jQuery Camera plugin on the page
<script type='text/javascript' src='../scripts/jquery.easing.1.3.js'></script>
<script type='text/javascript' src='../scripts/camera.min.js'></script>
3. Include required jQuery Camera CSS on the page. By editing this CSS file you can create your own personal skin, of course. But Camera already provides some skins. It has got 33 different colors for the icons.
<link rel='stylesheet' id='camera-css' href='../css/camera.css' type='text/css' media='all'>
4. Create the html. The URL of the image on the slide is added by using the HTML5 data-* attribute. This allows to load the image only when the slideshow calls it and not (lazy load method).
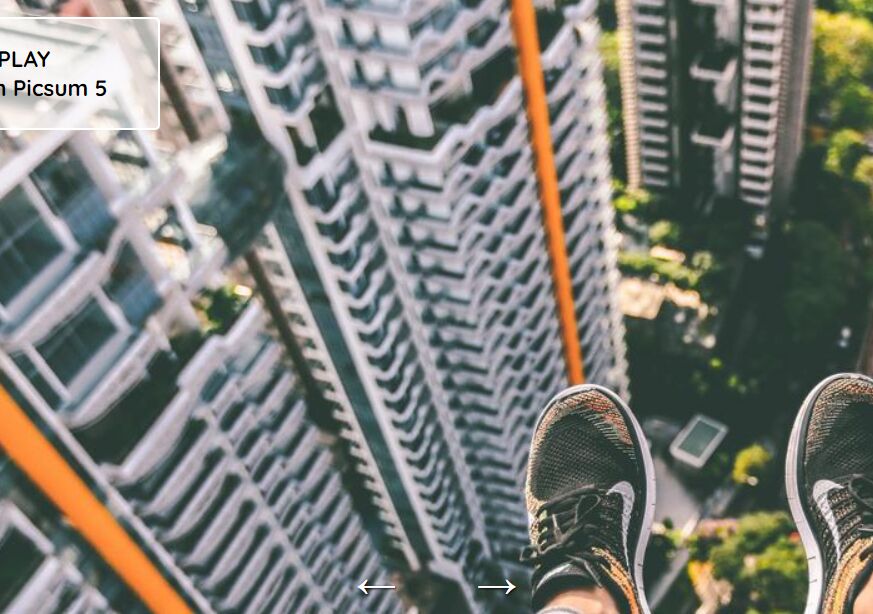
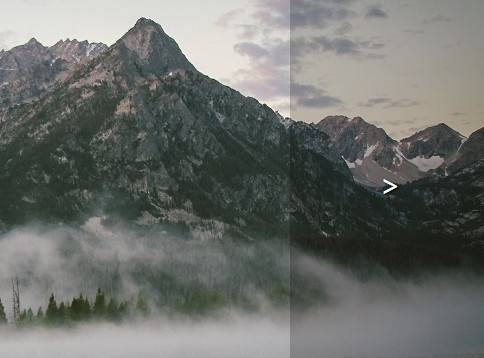
<div class="camera_wrap camera_azure_skin" id="camera_wrap_1"> <div data-thumb="../images/slides/thumbs/bridge.jpg" data-src="../images/slides/bridge.jpg"> <div class="camera_caption fadeFromBottom"> Camera is a responsive/adaptive slideshow. <em>Try to resize the browser window</em> </div> </div> <div data-thumb="../images/slides/thumbs/leaf.jpg" data-src="../images/slides/leaf.jpg"> <div class="camera_caption fadeFromBottom"> It uses a light version of jQuery mobile, <em>navigate the slides by swiping with your fingers</em> </div> </div> <div data-thumb="../images/slides/thumbs/road.jpg" data-src="../images/slides/road.jpg"> <div class="camera_caption fadeFromBottom"> <em>It's completely free</em> (even if a donation is appreciated) </div> </div> <div data-thumb="../images/slides/thumbs/sea.jpg" data-src="../images/slides/sea.jpg"> <div class="camera_caption fadeFromBottom"> Camera slideshow provides many options <em>to customize your project</em> as more as possible </div> </div> <div data-thumb="../images/slides/thumbs/shelter.jpg" data-src="../images/slides/shelter.jpg"> <div class="camera_caption fadeFromBottom"> It supports captions, HTML elements and videos and <em>it's validated in HTML5</em> (<a href="http://validator.w3.org/check?uri=http%3A%2F%2Fwww.pixedelic.com%2Fplugins%2Fcamera%2F&charset=%28detect+automatically%29&doctype=Inline&group=0&user-agent=W3C_Validator%2F1.2" target="_blank">have a look</a>) </div> </div> <div data-thumb="../images/slides/thumbs/tree.jpg" data-src="../images/slides/tree.jpg"> <div class="camera_caption fadeFromBottom"> Different color skins and layouts available, <em>fullscreen ready too</em> </div> </div> </div>
5. Call the plugin with options
<script>
jQuery(function(){
jQuery('#camera_wrap_1').camera({
height: '400px',
loader: 'bar',
pagination: false,
thumbnails: true
});
});
</script>
6. All the options
alignment: 'center' // topLeft, topCenter, topRight, centerLeft, center, centerRight, bottomLeft, bottomCenter, bottomRight
autoAdvance: true // true, false
mobileAutoAdvance: true // true, false. Auto-advancing for mobile devices
barDirection: 'leftToRight' // 'leftToRight', 'rightToLeft', 'topToBottom', 'bottomToTop'
barPosition: 'bottom' // 'left', 'right', 'top', 'bottom'
cols: 6
easing: 'easeInOutExpo' // for the complete list http://jqueryui.com/demos/effect/easing.html
mobileEasing: '' // leave empty if you want to display the same easing on mobile devices and on desktop etc.
fx: 'random' // 'random','simpleFade', 'curtainTopLeft', 'curtainTopRight', 'curtainBottomLeft', 'curtainBottomRight', 'curtainSliceLeft', 'curtainSliceRight', 'blindCurtainTopLeft', 'blindCurtainTopRight', 'blindCurtainBottomLeft', 'blindCurtainBottomRight', 'blindCurtainSliceBottom', 'blindCurtainSliceTop', 'stampede', 'mosaic', 'mosaicReverse', 'mosaicRandom', 'mosaicSpiral', 'mosaicSpiralReverse', 'topLeftBottomRight', 'bottomRightTopLeft', 'bottomLeftTopRight', 'bottomLeftTopRight', 'scrollLeft', 'scrollRight', 'scrollHorz', 'scrollBottom', 'scrollTop'
mobileFx: '' // leave empty if you want to display the same effect on mobile devices and on desktop etc.
gridDifference: 250 // to make the grid blocks slower than the slices, this value must be smaller than transPeriod
height: '50%' // here you can type pixels (for instance '300px'), a percentage (relative to the width of the slideshow, for instance '50%') or auto
hover: true // true, false. Pause on state hover. Not available for mobile devices
imagePath: 'images/' // the path to the image folder (it serves for the blank.gif, when you want to display videos)
loader: 'pie' // pie, bar, none (even if you choose "pie", old browsers like IE8- can't display it... they will display always a loading bar)
loaderColor: '#eeeeee'
loaderBgColor: '#222222'
loaderOpacity: .8 // 0, .1, .2, .3, .4, .5, .6, .7, .8, .9, 1
loaderPadding: 2 // how many empty pixels you want to display between the loader and its background
loaderStroke: 7 // the thickness both of the pie loader and of the bar loader. Remember: for the pie, the loader thickness must be less than a half of the pie diameter
minHeight: '200px' // you can also leave it blank
navigation: true // if true the navigation button (prev, next and play/stop buttons) will be visible, if false they will be always hidden
navigationHover: true // if true the navigation button (prev, next and play/stop buttons) will be visible on hover state only, if false they will be visible always
mobileNavHover: true // same as above, but only for mobile devices
opacityOnGrid: false // true, false. Decide to apply a fade effect to blocks and slices: if your slideshow is fullscreen or simply big, I recommend to set it false to have a smoother effect
overlayer: true // true, false. Decide to put a layer on the images to prevent the users grab them simply by clicking the right button of their mouse (.camera_overlayer)
pagination: true // true, false
playPause: true // true or false, to display or not the play/pause buttons
pauseOnClick: true // true, false. It stops the slideshow when you click the sliders
pieDiameter: 38 // piePosition: 'rightTop' 'rightTop', 'leftTop', 'leftBottom', 'rightBottom'
portrait: false // true, false. Select true if you don't want that your images are cropped
rows: 4
slicedCols: 12 // if 0 the same value of cols
slicedRows: 8 // if 0 the same value of rows
slideOn: 'random' // next, prev, random: decide if the transition effect will be applied to the current (prev) or the next slide
thumbnails: false // true, false
time: 7000 // milliseconds between the end of the sliding effect and the start of the nex one
transPeriod: 1500 // length of the sliding effect in milliseconds
More Examples:
This awesome jQuery plugin is developed by pixedelic. For more Advanced Usages, please check the demo page or visit the official website.