Simple Step-by-step Wizard Modal For Bootstrap - modal-steps.js
| File Size: | 8.26 KB |
|---|---|
| Views Total: | 31582 |
| Last Update: | |
| Publish Date: | |
| Official Website: | Go to website |
| License: | MIT |
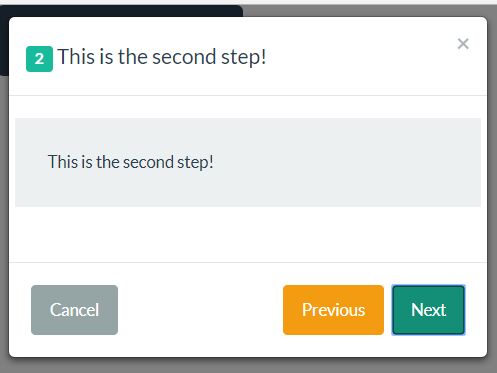
modal-steps.js is a lightweight and easy-to-use jQuery plugin that helps you create an interactive wizard modal to display any information (typically form fields, site features, etc) step by step. Heavily based on Bootstrap's Modal component.
How to use it:
1. To get started, you need to load the latest jQuery library and Bootstrap framework in the html page.
<link rel="stylesheet" href="bootstrap.min.css">
<script src="https://code.jquery.com/jquery-1.12.4.min.js"
        integrity="sha384-nvAa0+6Qg9clwYCGGPpDQLVpLNn0fRaROjHqs13t4Ggj3Ez50XnGQqc/r8MhnRDZ"
        crossorigin="anonymous">
</script>
<script src="bootstrap.min.js"></script>
2. Add the wizard title to the modal header.
<div class="modal-header"> <button type="button" class="close" data-dismiss="modal" aria-label="Close"><span aria-hidden="true">×</span></button> <h4 class="js-title-step"></h4> </div>
3. Add the wizard steps to the modal body.
<div class="modal-body">
  <div class="row hide" data-step="1" data-title="This is the first step!">
    <div class="jumbotron">This is the first step!</div>
  </div>
  <div class="row hide" data-step="2" data-title="This is the second step!">
    <div class="jumbotron">This is the second step!</div>
  </div>
  <div class="row hide" data-step="3" data-title="This is the last step!">
    <div class="jumbotron">This is the last step!</div>
  </div>
</div>
4. Add control buttons to the modal footer.
<div class="modal-footer">
  <button type="button" class="btn btn-default js-btn-step pull-left" data-orientation="cancel" data-dismiss="modal"></button>
  <button type="button" class="btn btn-warning js-btn-step" data-orientation="previous"></button>
  <button type="button" class="btn btn-success js-btn-step" data-orientation="next"></button>
</div>
5. The full wizard modal should be like this:
<!-- Modal -->
<div class="modal fade" id="myModal" tabindex="-1" role="dialog" aria-labelledby="myModalLabel">
<div class="modal-dialog" role="document">
<div class="modal-content">
<div class="modal-header">
<button type="button" class="close" data-dismiss="modal" aria-label="Close"><span aria-hidden="true">×</span></button>
<h4 class="js-title-step"></h4>
</div>
<div class="modal-body">
<div class="row hide" data-step="1" data-title="This is the first step!">
<div class="jumbotron">This is the first step!</div>
</div>
<div class="row hide" data-step="2" data-title="This is the second step!">
<div class="jumbotron">This is the second step!</div>
</div>
<div class="row hide" data-step="3" data-title="This is the last step!">
<div class="jumbotron">This is the last step!</div>
</div>
</div>
<div class="modal-footer">
<button type="button" class="btn btn-default js-btn-step pull-left" data-orientation="cancel" data-dismiss="modal"></button>
<button type="button" class="btn btn-warning js-btn-step" data-orientation="previous"></button>
<button type="button" class="btn btn-success js-btn-step" data-orientation="next"></button>
</div>
</div>
</div>
</div>
6. Create a trigger button to toggle the wizard modal.
<button type="button" class="btn btn-primary btn-lg" data-toggle="modal" data-target="#myModal">
  Launch wizard modal
</button>
7. Initialize the wizard modal with default options.
$('#myModal').modalSteps();
8. Full plugin options and callback functions.
$('#myModal').modalSteps({
  btnCancelHtml: "Cancel",
  btnPreviousHtml: "Previous",
  btnNextHtml: "Next",
  btnLastStepHtml: "Complete",
  disableNextButton: false,
  completeCallback: function() {},
  callbacks: {},
  getTitleAndStep: function() {}
});
This awesome jQuery plugin is developed by BhavanPatel. For more Advanced Usages, please check the demo page or visit the official website.
