jQuery Plugin To Manage Bootstrap 4 Modal Component - Modal.js
| File Size: | 7.13 KB |
|---|---|
| Views Total: | 3515 |
| Last Update: | |
| Publish Date: | |
| Official Website: | Go to website |
| License: | MIT |

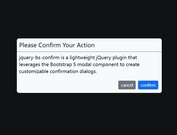
Modal.js is a lightweight jQuery plugin used to manage and enhance the default Bootstrap 4 modal component with custom HTML content, actions buttons, height/width and AJAX form submitting.
How to use it:
1. Include the necessary Bootstrap 4's core style sheet in the header of the html page.
<link rel="stylesheet" href="https://maxcdn.bootstrapcdn.com/bootstrap/4.0.0-alpha.5/css/bootstrap.min.css" integrity="sha384-AysaV+vQoT3kOAXZkl02PThvDr8HYKPZhNT5h/CXfBThSRXQ6jW5DO2ekP5ViFdi" crossorigin="anonymous">
2. Include the latest version of jQuery library and the jQuery Modal.js script on the webpage.
<script src="//code.jquery.com/jquery-3.1.1.min.js"></script>
<script src="modal.js"></script>
3. The JavaScript to create a basic Bootstrap modal window on the webpage.
<button type="button"
        id="viewDialog"
        data-item-data="{"gate":"IcbcZJ","transId":"6666","orderCorrectStatus":"success","amount":"0.00","bizType":"WITHDRAW_BATCH"}">
        Custom Template
</button>
$(function(){
  var dialog = new Dialog({
    triggerEle: "#createDefaultDialog"
  });
})
4. The JavaScript to create a Bootstrap modal window with custom data template.
<button type="button" id="createDefaultDialog">Basic</button>
var dialog2 = new Dialog({
  titleText: 'Dialog Title',
  showFooter: false
});

function contentTpl() {
/*!
<table class="table table-striped table-bordered">
  <thead>
    <tr><th colspan="2">Logs</th></tr>
  </thead>
  <tbody>
    <tr>
      <td class="text-right" style="width:120px">Gate:</td><td>{{gate}}</td>
    </tr>
    <tr>
      <td class="text-right" style="width:120px">ID:</td><td>{{transId}}</td>
    </tr>
    <tr>
      <td class="text-right" style="width:120px">Type:</td><td>{{bizType}}</td>
    </tr>
    <tr>
      <td class="text-right" style="width:120px">Amount:</td><td>{{amount}}</td>
    </tr>
    <tr>
      <td class="text-right" style="width:120px">Status:</td><td>{{orderCorrectStatus}}</td>
    </tr>
  </tbody>
</table>
*/
}

$('#viewDialog').on('click', function(){
  var data = $(this).data('itemData'),
  dialogContentEle = $(dialog2._build(dialog2._getDoc(contentTpl), data));
  dialog2
    .insertDialogContent(dialogContentEle.get(0).outerHTML)
    .show()
})
4. Create an AJAX form modal with the 'ajaxSubmitSuccess' event.
<button type="button" id="eventDialog">AJAX FORM</button>
var dialog3 = new Dialog();

function contentTpl2() {
/*!
<form action="/action.htm">
  <div class="alert alert-danger" role="alert" style="display:none;"></div>
  <label>Note</label>
  <textarea class="form-control" name="note" rows="5"></textarea>
</form>
*/
}

$('#eventDialog').on('click', function(){
  var dialogContentEle = $(dialog5._build(dialog5._getDoc(contentTpl4), null));
  dialog5
    .insertDialogContent(dialogContentEle.get(0).outerHTML)
    .show()
})

// reload the page
$(document).on('ajaxSubmitSuccess', function(){
  location.reload()
})
5. Feel free to customize the Bootstrap modal using the following settings.
width: "600px",
height: "auto",
titleText: "Modal Title",
content: "",
confirmBtnText: "Confirm",
cancelBtnText: "Cancel",
showFooter: true,
triggerEle: "" // jquery selector
Change log:
2016-12-23
- remove unnecessary return
This awesome jQuery plugin is developed by Vivi-wu. For more Advanced Usages, please check the demo page or visit the official website.
