Responsive Multi-Level Flyout Menu Plugin for Bootstrap 5
| File Size: | 21.5 KB |
|---|---|
| Views Total: | 361 |
| Last Update: | |
| Publish Date: | |
| Official Website: | Go to website |
| License: | MIT |

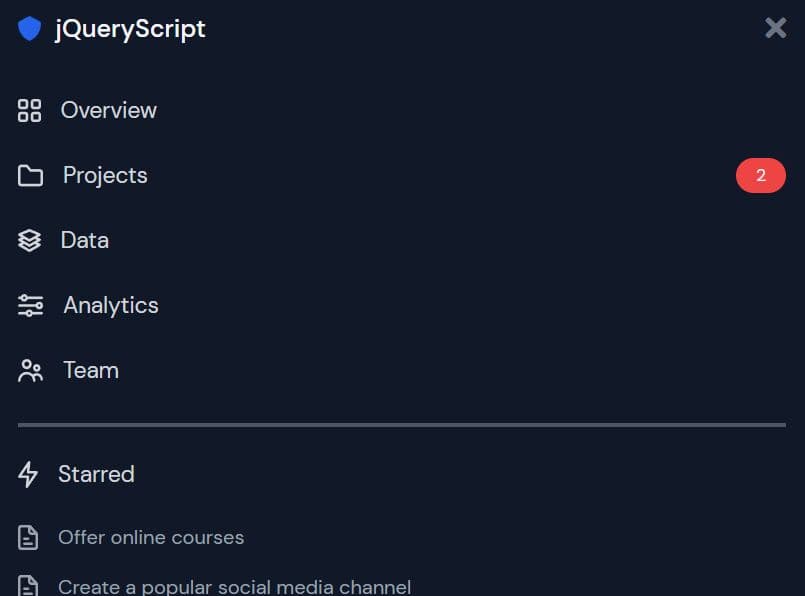
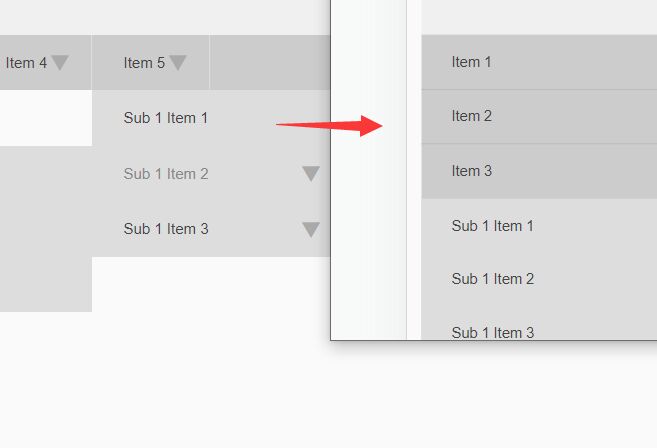
FlyoutMenu is a lightweight jQuery plugin that creates responsive, accessible, mobile-friendly, multi-level navigation menus for Bootstrap 5 projects.
It handles the complex logic for nested navigation, touch and hover interactions, and right-to-left (RTL) layouts right out of the box.
Features:
- Unlimited Nesting Depth: Create navigation hierarchies as deep as your information architecture.
- Automatic RTL Detection: The plugin reads the
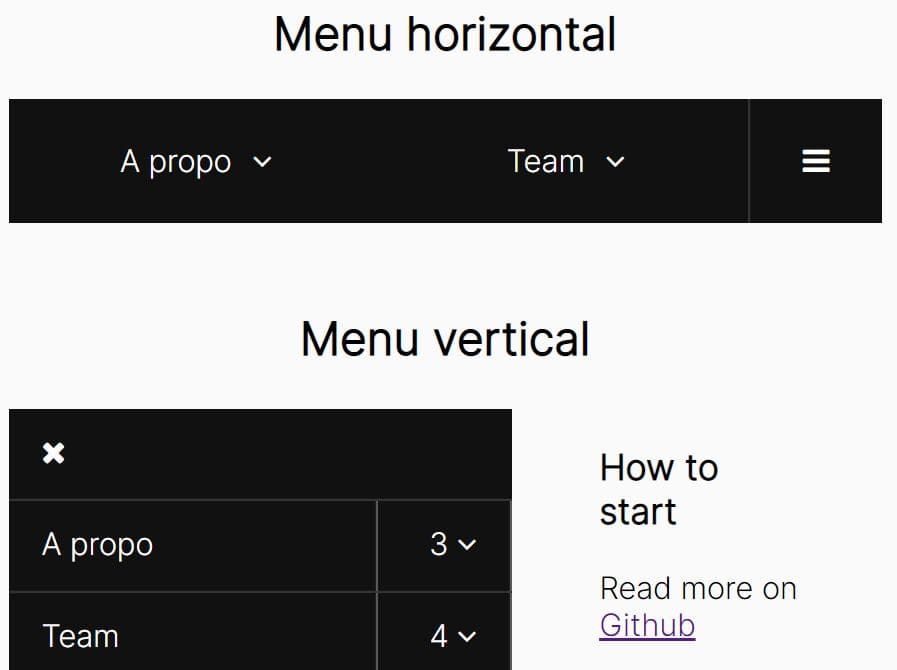
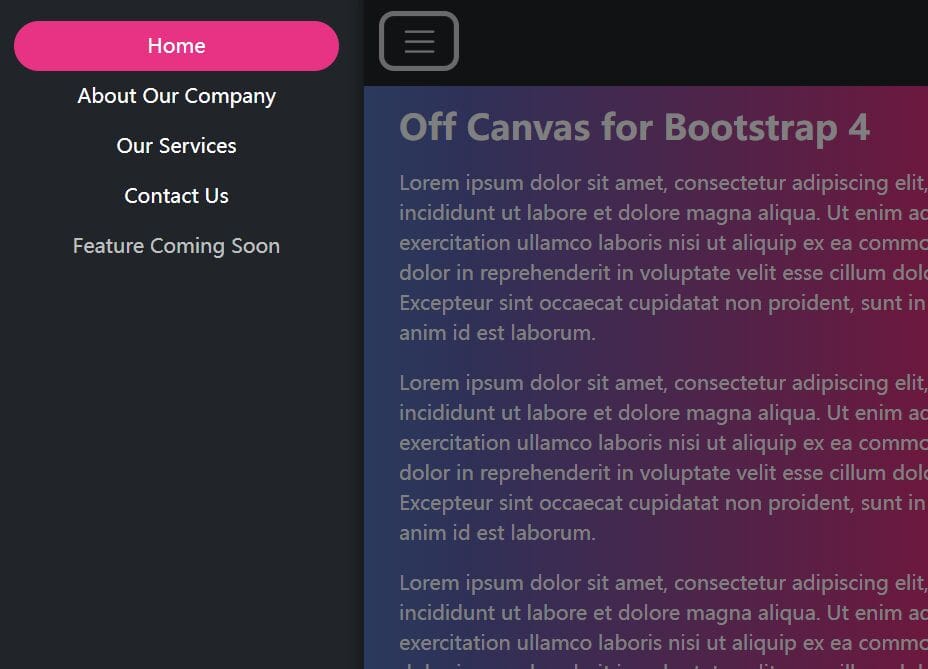
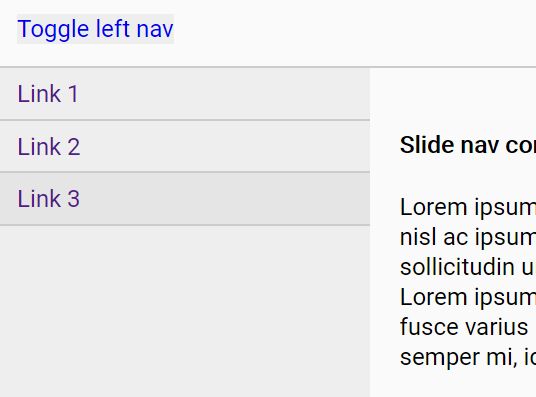
dirattribute from parent elements and automatically adjusts submenu positioning and caret directions for right-to-left languages. - Responsive Layouts: Automatically switches between a horizontal layout for desktops and a vertical, mobile-friendly layout on smaller screens.
- Touch and Hover Detection: Submenus open on hover for desktop users and on click for touch devices, with automatic device capability detection.
- Bootstrap Dark Mode Integration: Built-in support for Bootstrap's
data-bs-themeattribute with CSS variable-based theming. - Keyboard Navigation: Arrow keys navigate between items, Enter activates links, and Escape closes submenus, with directional controls that reverse appropriately in RTL mode.
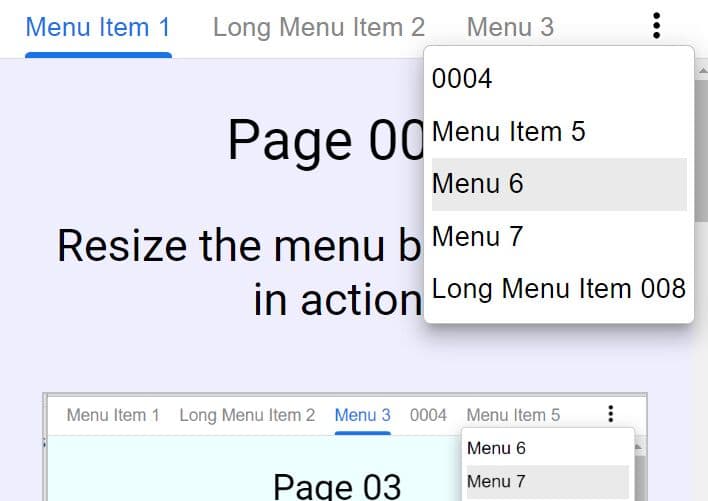
- Viewport Edge Detection: Submenus automatically reposition themselves when they would otherwise extend beyond the viewport boundaries.
- Dual Initialization Modes: Initialize from JSON data structures or enhance existing HTML markup.
- WCAG 2.1 Level AA Compliance: Meets accessibility standards with proper contrast ratios, focus indicators, and semantic ARIA attributes on all interactive elements.
- High Performance: CSS file weighs approximately 3 KB minified, JavaScript adds roughly 5 KB, and theme switches complete in under 50 milliseconds.
Use Cases:
- Complex E-commerce Sites: For managing deep product category menus.
- SaaS Application Dashboards: Perfect for building the main navigation or settings menus inside a web app.
- Documentation Site Navigation: Structure technical documentation with nested topic hierarchies that let readers explore related content.
How To Use It:
1. The plugin requires Bootstrap 5, jQuery 3.7 or higher, and Bootstrap Icons. Load these dependencies before the FlyoutMenu scripts. The CSS file must be included after Bootstrap's stylesheet to ensure proper cascade order.
<!-- Bootstrap + jQuery  -->
<link rel="stylesheet" href="/path/to/cdn/bootstrap.min.css" />
<script src="/path/to/cdn/jquery.min.js"></script>
<script src="/path/to/cdn/bootstrap.bundle.min.js"></script>

<!-- Bootstrap Icons -->
<link href="https://cdn.jsdelivr.net/npm/[email protected]/font/bootstrap-icons.css" rel="stylesheet">

<!-- FlyoutMenu -->
<link href="/path/to/css/widget-flyout.css" rel="stylesheet">
<script src="/path/to/js/widget-flyout.js"></script>
2. Create a menu container with the widget classes. The dir attribute on the wrapper determines text direction and submenu positioning.
<div class="widget" dir="ltr">
  <div class="widget-header bg-danger text-white d-flex justify-content-between align-items-center px-3 py-2">
    <span class="widget-title">Navigation</span><i class="bi bi-grid-3x3-gap"></i>
  </div>
  <div class="widget-body p-3" id="menu-json-ltr"></div>
</div>
3. Render your menu items from JSON. The renderFlyoutFromJson() function accepts a selector and an array of menu item objects. Each object requires a label property and can optionally include icon classes, URLs, click handlers, and nested children arrays.
const data = [
  {
    label: 'JavaScript',
    icon: 'bi bi-javascript',
    url: '#',
    children: [
      { label: 'JSON', icon: 'bi bi-filetype-json', url: '#' },
      { label: 'JSX', icon: 'bi bi-filetype-jsx', url: '#' }
    ],
    onClick: function(item, event) {},
  },
  { label: 'HTML', icon: 'bi bi-filetype-html', url: '#' }
];
renderFlyoutFromJson('#my-menu', data);
4. For server-rendered applications or static sites, you can write the menu structure directly in HTML and enhance it with the initWidgetFlyout() function. The markup uses specific classes that the plugin recognizes: widget-flyout-menu for the root list, dropdown-submenu for items with children, and dropdown-toggle for items that open submenus.
<div class="widget" dir="ltr">
  <div class="widget-header bg-danger text-white d-flex justify-content-between align-items-center px-3 py-2">
    <span class="widget-title">Navigation</span>
    <i class="bi bi-grid-3x3-gap"></i>
  </div>
  <div class="widget-body p-3" id="menu-html-ltr">
    <ul class="widget-flyout-menu list-unstyled">
      <li class="dropdown-submenu">
        <a href="#" class="dropdown-toggle dropdown-item">
          <i class="bi bi-house"></i>Home </a>
        <ul class="dropdown-menu">
          <li>
            <a href="#" class="dropdown-item">
              <i class="bi bi-speedometer2"></i>Dashboard </a>
          </li>
          <li class="dropdown-submenu">
            <a href="#" class="dropdown-toggle dropdown-item">
              <i class="bi bi-gear"></i>Settings </a>
            <ul class="dropdown-menu">
              <li>
                <a href="#" class="dropdown-item">
                  <i class="bi bi-person"></i>Profile </a>
              </li>
              <li>
                <a href="#" class="dropdown-item">
                  <i class="bi bi-shield-lock"></i>Security </a>
              </li>
              <li class="dropdown-submenu">
                <a href="#" class="dropdown-toggle dropdown-item">
                  <i class="bi bi-bell"></i>Notifications </a>
                <ul class="dropdown-menu">
                  <li>
                    <a href="#" class="dropdown-item">
                      <i class="bi bi-envelope"></i>Email </a>
                  </li>
                  <li>
                    <a href="#" class="dropdown-item">
                      <i class="bi bi-phone"></i>SMS </a>
                  </li>
                  <li>
                    <a href="#" class="dropdown-item">
                      <i class="bi bi-megaphone"></i>Push </a>
                  </li>
                </ul>
              </li>
            </ul>
          </li>
        </ul>
      </li>
      <li class="dropdown-submenu">
        <a href="#" class="dropdown-toggle dropdown-item">
          <i class="bi bi-box"></i>Products </a>
        <ul class="dropdown-menu">
          <li>
            <a href="#" class="dropdown-item">
              <i class="bi bi-laptop"></i>Electronics </a>
          </li>
          <li>
            <a href="#" class="dropdown-item">
              <i class="bi bi-book"></i>Books </a>
          </li>
          <li>
            <a href="#" class="dropdown-item">
              <i class="bi bi-controller"></i>Games </a>
          </li>
        </ul>
      </li>
      <li>
        <a href="#" class="dropdown-item">
          <i class="bi bi-info-circle"></i>About </a>
      </li>
      <li>
        <a href="#" class="dropdown-item">
          <i class="bi bi-envelope"></i>Contact </a>
      </li>
    </ul>
  </div>
</div>
initWidgetFlyout('#my-menu');
5. Both initialization functions accept an optional configuration object. The hoverDelay setting controls the millisecond delay before hover events trigger submenu opening, which helps prevent accidental activations when users move their cursor across the menu. The closeOnClickOutside option determines whether clicking outside the menu collapses all open submenus. The keyboardNav flag enables or disables keyboard controls.
renderFlyoutFromJson('#my-menu', data, {
  hoverDelay: 150,
  closeOnClickOutside: true,
  keyboardNav: true
});
6. Loading menu structures from API endpoints requires fetching the JSON data and passing it to the render function. This pattern works well for user-specific navigation or content management systems where menu items change based on permissions.
$.ajax({
  url: '/api/menu',
  method: 'GET',
  success: function(data) {
    renderFlyoutFromJson('#my-menu', data, {
      hoverDelay: 150,
      closeOnClickOutside: true
    });
  },
  error: function(xhr, status, error) {
    console.error('Failed to load menu:', error);
    $('#my-menu').html('<p class="text-danger">Unable to load navigation</p>');
  }
});
7. Updating an existing menu requires clearing the container and calling the render function again with new data. The plugin does not maintain internal state about menu items, so replacing the HTML content completely reinitializes all event handlers and positioning logic.
// Clear existing menu
$('#my-menu').empty();

// Render updated menu structure
renderFlyoutFromJson('#my-menu', updatedMenuData);
Dark Mode Implementation:
1. The FlyoutMenu plugin integrates with Bootstrap's theme system through a dedicated FlyoutTheme API. The init() method reads the saved preference from localStorage or falls back to the system's color scheme preference. The theme state persists across page loads, and the watchSystemTheme() method keeps the menu synchronized when users change their operating system's theme settings.
// Initialize theme on page load
FlyoutTheme.init();

// Watch for system theme changes
FlyoutTheme.watchSystemTheme();

// Manual theme controls
FlyoutTheme.setTheme('dark');  // Force dark mode
FlyoutTheme.setTheme('light'); // Force light mode
FlyoutTheme.setTheme('auto');  // Follow system preference

// Toggle between modes
FlyoutTheme.toggle();

// Read current theme
const currentTheme = FlyoutTheme.getTheme(); // Returns 'light' or 'dark'
2. Creating a theme switcher requires initializing the theme system and updating the button's icon when the theme changes. This example uses Bootstrap Icons to display a moon icon in light mode and a sun icon in dark mode.
<button type="button" class="btn btn-primary" id="themeToggle">
  <i class="bi bi-moon-stars-fill"></i>
</button>
$(document).ready(function() {
  FlyoutTheme.init();
  FlyoutTheme.watchSystemTheme();

  $('#themeToggle').on('click', function() {
    FlyoutTheme.toggle();
    const theme = FlyoutTheme.getTheme();
    const icon = theme === 'dark' ? 'bi-sun-fill' : 'bi-moon-stars-fill';
    $(this).find('i').attr('class', `bi ${icon}`);
  });
});
3. The theme API provides five core methods for managing color schemes.
| Method | Parameters | Returns | Description |
|---|---|---|---|
FlyoutTheme.init() |
none | string | Initialize theme from localStorage or system preference |
FlyoutTheme.setTheme() |
theme: 'light' | 'dark' | 'auto' | string | Set specific theme and save to localStorage |
FlyoutTheme.toggle() |
none | string | Switch between light and dark modes |
FlyoutTheme.getTheme() |
none | string | Get current active theme ('light' or 'dark') |
FlyoutTheme.watchSystemTheme() |
none | void | Monitor system preference changes and auto-update |
4. The theme system uses CSS custom properties that can be overridden to create custom color schemes. The default values provide good contrast ratios for accessibility, but you can adjust them to match your brand colors.
:root {
  --flyout-bg: #ffffff;
  --flyout-border-color: #dee2e6;
  --flyout-text-color: #212529;
  --flyout-hover-bg: #f8f9fa;
  --flyout-hover-text: #212529;
  --flyout-active-bg: #e9ecef;
  --flyout-focus-outline: #0d6efd;
  --flyout-shadow: rgba(0, 0, 0, 0.15);
}

[data-bs-theme="dark"] {
  --flyout-bg: #212529;
  --flyout-border-color: #495057;
  --flyout-text-color: #dee2e6;
  --flyout-hover-bg: #343a40;
  --flyout-hover-text: #ffffff;
  --flyout-active-bg: #495057;
  --flyout-focus-outline: #0d6efd;
  --flyout-shadow: rgba(0, 0, 0, 0.5);
}
FAQs:
Q: How do I prevent the menu from closing when I click on a parent item that has both a URL and children?
A: Add a click handler that calls event.stopPropagation() to prevent the event from bubbling up to the document-level click handler that closes menus. You can implement this in the onClick function for specific menu items or attach a delegated event handler to all items with children.
Q: The submenus appear behind my sticky header when the menu is near the top of the page. How do I fix this?
A: This happens when elements have z-index values that place them above the menu's stacking context. Add a CSS rule that increases the z-index on dropdown menus to a value higher than your sticky header. Most headers use values between 1000 and 1030, so setting .dropdown-menu { z-index: 10000; } usually resolves the layering issue. If that does not work, check whether parent containers have overflow: hidden or transform properties that create new stacking contexts.
Q: Is there a way to load menu items progressively as users open submenus instead of loading the entire tree upfront?
A: The plugin does not include lazy loading functionality, but you can implement it by starting with parent items that have empty children arrays and an onClick handler. When the handler fires, make an AJAX request to fetch the submenu data, then use jQuery's DOM manipulation methods to append the new items to the submenu container. After appending, call initWidgetFlyout() on the modified container to attach event handlers to the new elements.
Q: Can I use custom animations when submenus open and close instead of the default fade effect?
A: The animation timing comes from Bootstrap's transition classes, but you can override them by modifying the CSS transition property on .dropdown-menu elements. Create a custom CSS rule that specifies which properties to animate and the duration. For example, transition: opacity 0.3s ease, transform 0.3s ease combined with a transform that slides the menu in from the side creates a different visual effect than the default fade.
Q: Can I use a different icon library, like Font Awesome?
A: Absolutely. The icon property in the JSON data is just a string that gets applied as a class. As long as you have the icon library's CSS loaded, you can use its class names.
Related Resources:
- 10 Best Responsive Dropdown Menus In JavaScript & CSS
- 10 Best Responsive Menu Systems In jQuery/JavaScript/CSS
This awesome jQuery plugin is developed by delphiassistant. For more Advanced Usages, please check the demo page or visit the official website.