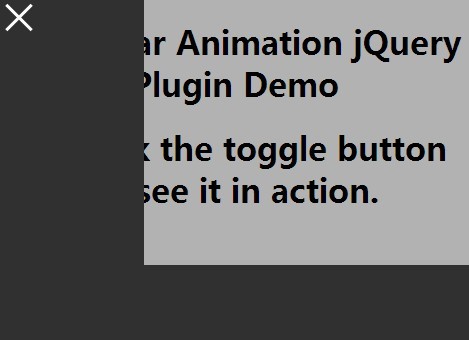
Fullpage Expanding Menu with jQuery and CSS3
| File Size: | 2.87 KB |
|---|---|
| Views Total: | 2819 |
| Last Update: | |
| Publish Date: | |
| Official Website: | Go to website |
| License: | MIT |

Just another fullscreen navigation concept that morphs a hamburger trigger into a full page navigation menu using jQuery, JavaScript and CSS / CSS3.
How to use it:
1. Create the Html for the full page navigation menu.
<div class="hamburger-trigger">Menu</div>
2. Create a hamburger trigger to toggle the menu.
<div class="menu">
  <div class="menu__bg"></div>
  <nav class="menu__container">
    <ul>
      <li><a href="#">Home</a></li>
      <li><a href="#">About</a></li>
      <li><a href="#">Contact</a></li>
      <li><a href="#">Blog</a></li>
    </ul>
  </nav>
  <div class="menu__close"></div>
</div>
3. Style the hamburger trigger.
.hamburger-trigger {
  position: absolute;
  top: 50%;
  left: 50%;
  text-transform: uppercase;
  font-weight: bold;
  text-align: center;
  font-size: 14px;
  color: #000;
  width: 42px;
  height: 42px;
  line-height: 42px;
  margin: -21px 0 0 -21px;
  cursor: pointer;
}

.hamburger-trigger:before, .hamburger-trigger:after {
  content: '';
  width: 42px;
  height: 10px;
  background: #000;
  position: absolute;
  display: block;
  left: 0;
}

.hamburger-trigger:before { top: 0; }

.hamburger-trigger:after { bottom: 0; }

.hamburger-trigger--active {
  animation-name: burgertext;
  animation-duration: 4s;
  animation-iteration-count: 1;
}

.hamburger-trigger--active:before {
  animation-name: burgertop;
  animation-duration: 4s;
  animation-iteration-count: 1;
}

.hamburger-trigger--active:after {
  animation-name: burgerbottom;
  animation-duration: 4s;
  animation-iteration-count: 1;
}
4. Style the full page menu.
.menu {
  display: none;
  width: 100vw;
  height: 100vh;
  overflow: hidden;
  position: relative;
}

.menu__bg {
  position: absolute;
  opacity: 0;
  top: 50%;
  left: 50%;
  width: 32px;
  height: 32px;
  border-radius: 50%;
  transform: translate(-50%, -50%);
  background: #000;
}

.menu__bg--active {
  animation-name: menubg;
  animation-duration: 4s;
  animation-iteration-count: 1;
  animation-fill-mode: forwards;
}

.menu__container {
  position: absolute;
  opacity: 0;
  top: 50%;
  left: 50%;
  transform: translate(-50%, -50%);
  line-height: 1.5;
  text-align: center;
  font-size: 18px;
  text-transform: uppercase;
}

.menu__container--active {
  animation-name: menufg;
  animation-duration: 4s;
  animation-iteration-count: 1;
  animation-fill-mode: forwards;
}

.menu__container ul {
  margin: 0;
  padding: 0;
  list-style: none;
}

.menu__container a {
  display: inline-block;
  transition: all 0.2s;
  color: #fff;
  text-decoration: none;
  padding: 5px 10px;
}

.menu__container a:hover {
  background: #fff;
  color: #000;
}

.menu__close {
  position: absolute;
  top: 20px;
  right: 20px;
  background: #fff;
  border-radius: 50%;
  width: 40px;
  height: 40px;
  line-height: 40px;
  text-align: center;
  color: #000;
  cursor: pointer;
}

.menu__close:after { content: '\2715'; }
5. Create the morphing effects using CSS keyframes.
@keyframes
burgertext {  0% {
 color: black;
}
 10% {
 color: black;
}
 12% {
 color: transparent;
}
 100% {
 color: transparent;
}
}

@keyframes
burgerbottom {  0% {
 bottom: 0;
 opacity: 1;
}
 5% {
 bottom: -3px;
 opacity: 1;
}
 10% {
 bottom: -3px;
 opacity: 1;
}
 12% {
 bottom: 15px;
 opacity: 1;
}
 13% {
 bottom: 15px;
 opacity: 0;
}
 100% {
 bottom: 15px;
 opacity: 0;
}
}

@keyframes
burgertop {  0% {
 left: 0;
 top: 0;
 transform: rotate(0);
 width: 42px;
 height: 10px;
 border-radius: 0;
}
 5% {
 left: 0;
 top: -3px;
 transform: rotate(0);
 width: 42px;
 height: 10px;
 border-radius: 0;
}
 10% {
 left: 0;
 top: -3px;
 transform: rotate(0);
 width: 42px;
 height: 10px;
 border-radius: 0;
}
 12% {
 left: 0;
 top: 15px;
 transform: rotate(0);
 width: 42px;
 height: 10px;
 border-radius: 0;
}
 20% {
 left: 0;
 top: 15px;
 transform: rotate(0);
 width: 42px;
 height: 10px;
 border-radius: 0;
}
 30% {
 left: 0;
 top: 0;
 transform: rotate(1280deg);
 width: 42px;
 height: 42px;
 border-radius: 50%;
}
 35% {
 left: 0;
 top: 0;
 transform: rotate(0);
 width: 42px;
 height: 42px;
 border-radius: 50%;
}
 38% {
 left: 4px;
 top: 4px;
 transform: rotate(0);
 width: 34px;
 height: 34px;
 border-radius: 50%;
}
 100% {
 left: 4px;
 top: 4px;
 transform: rotate(0);
 width: 34px;
 height: 34px;
 border-radius: 50%;
}
}

@keyframes
menubg {  0% {
 opacity: 0;
 width: 32px;
 height: 32px;
}
 38% {
 opacity: 0;
 width: 32px;
 height: 32px;
}
 39% {
 opacity: 1;
 width: 32px;
 height: 32px;
}
 100% {
 opacity: 1;
 width: 5000px;
 height: 5000px;
}
}

@keyframes
menufg {  0% {
 opacity: 0;
}
 40% {
 opacity: 0;
}
 60% {
 opacity: 1;
}
 100% {
 opacity: 1;
}
}
6. Load the necessary jQuery JavaScript library at the end of the document.
<script src="//code.jquery.com/jquery-2.1.4.min.js"></script>
7. Active the full page menu.
$(".hamburger-trigger").click(function(){
  $(this).addClass("hamburger-trigger--active");
  $('.menu').show();
  $('.menu__bg').addClass("menu__bg--active");
  $('.menu__container').addClass("menu__container--active");
});

$(".menu__close").click(function(){
  $(".hamburger-trigger").removeClass("hamburger-trigger--active");
  $('.menu').hide();
  $('.menu__bg').removeClass("menu__bg--active");
  $('.menu__container').removeClass("menu__container--active");
});
This awesome jQuery plugin is developed by ryandunn. For more Advanced Usages, please check the demo page or visit the official website.