Multi-step Sliding Form Wizard Plugin - jQuery Book.js
| File Size: | 5.41 KB |
|---|---|
| Views Total: | 2821 |
| Last Update: | |
| Publish Date: | |
| Official Website: | Go to website |
| License: | MIT |
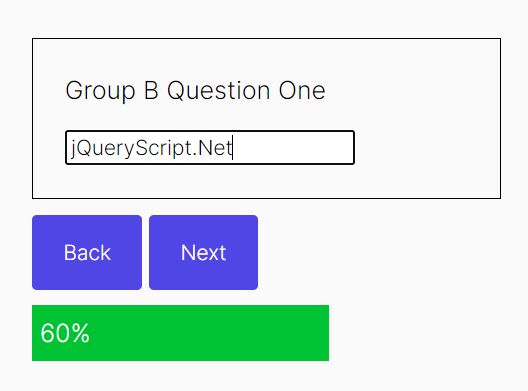
Book.js is a form wizard plugin that converts an HTML form into a sliding wizard interface with steps.
Compatible with Bootstrap framework and allows you to use the jquery-validate plugin to validate user input before navigating to the next step.
How to use it:
1. Load the needed jQuery library and jQuery UI (for animations and easing functions) in the document.
<script src="/path/to/cdn/jquery.min.js"></script>
<script src="/path/to/cdn/jquery-ui.min.js"></script>
2. Load the jquery-validate plugin if you want to validate form fields.
<script src="/path/to/cdn/jquery.validate.min.js"></script>
3. Load the jQuery Book.js plugin's script in the document.
<script src="/path/to/jquery-book.js"></script>
4. Create a form wizard following the HTML structure as displayed below:
- The
<form>tag will be your container and referred to as a Book. - The book contains pages, each page is a
<section>. - Each section will contain a part of the form to be displayed on that particular page.
- For the form to navigate between pages it must include a next or previous button within that page.
- These buttons must include the classes
"page-next"or"page-prev"to function. - Pages are designed to fit whatever the dimensions of the book container.
- This is handled by the plugin so no extra CSS is necessary by the web designer.
- Attempting to override this will mess up the animations.
- The book can be set to any size, or left alone to fill a bootstrap column and remain responsive.
<form name="demo" id="demo" class="myBook">
<section>
<label for="fname">First name:</label><br>
<input type="text" id="fname" name="fname" class="form-control" placeholder="John" required><br>
<label for="lname">Last name:</label><br>
<input type="text" id="lname" name="lname" class="form-control" placeholder="Doe" required><br><br>
<button type="button" class="page-next btn btn-primary">Next</button>
</section>
<section>
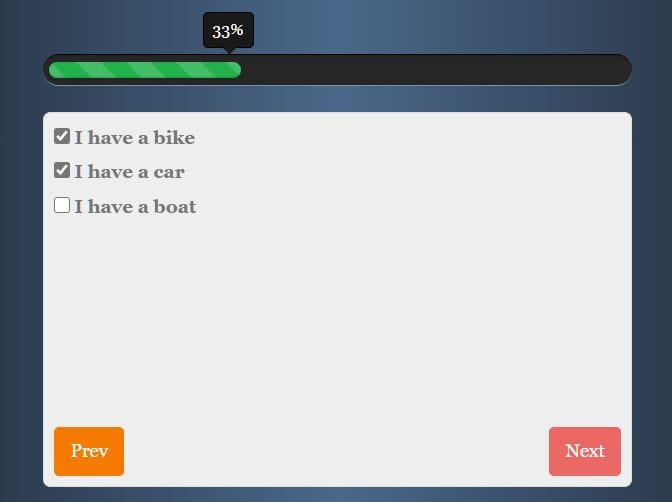
<input type="checkbox" id="vehicle1" name="vehicle1" value="Bike" >
<label for="vehicle1"> I have a bike</label><br>
<input type="checkbox" id="vehicle2" name="vehicle2" value="Car">
<label for="vehicle2"> I have a car</label><br>
<input type="checkbox" id="vehicle3" name="vehicle3" value="Boat">
<label for="vehicle3"> I have a boat</label><br/><br>
<button type="button" class="page-prev btn btn-danger">Prev</button>
<button type="button" class="page-next btn btn-primary">Next</button>
</section>
<section class="page">
<a href="#">Terms of Service</a><br/>
<input type="checkbox" id="ts" name="ts" value="1" required>
<label for="ts"> I agree</label><br>
<button type="button" class="page-prev btn btn-danger">Prev</button>
<button type="submit" class="page-next btn btn-success" id="sendForm">Complete</button>
</section>
<section class="page" style="margin:auto;text-align:center">
Your form has been submitted.
</section>
</form>
5. Initialize the form wizard with the following options.
- onPageChange: fired when a page is changed
- 'speed': animation speed
$thing = $('#demo').book({
  onPageChange: updateProgress,
  speed:200}
).validate();
6. Create a custom progress bar to visualize on which step you're viewing.
<div class="progress">
  <div class="progress-bar progress-bar-success progress-bar-striped active" style="width: 0%;">
    <div class="progress-value">0%</div>
  </div>
</div>
/* Update progress bar whenever the page changes */
function updateProgress(prevPageIndex, currentPageIndex, pageCount, pageName){
  t = (currentPageIndex / (pageCount-1)) * 100;
  $('.progress-bar').attr('aria-valuenow', t);
  $('.progress-bar').css('width', t+'%');
  //$('.progress span').text('Completed: '+Math.trunc(t)+'%');
  $('.progress-value').text(Math.trunc(t)+'%');
}
.progress {position:relative; }

.progress span {
  position:absolute;
  left:0;
  width:100%;
  text-align:center;
  z-index:2;
  font-weigh:bold;
}

.progress{
  height: 25px;
  background: #262626;
  padding: 5px;
  overflow: visible;
  border-radius: 20px;
  border-top: 1px solid #000;
  border-bottom: 1px solid #7992a8;
  margin-top: 50px;
}

.progress .progress-bar{
  border-radius: 20px;
  position: relative;
  animation: animate-positive 2s;
}

.progress .progress-value{
  display: block;
  padding: 3px 7px;
  font-size: 13px;
  color: #fff;
  border-radius: 4px;
  background: #191919;
  border: 1px solid #000;
  position: absolute;
  top: -40px;
  right: -10px;
}

.progress .progress-value:after{
  content: "";
  border-top: 10px solid #191919;
  border-left: 10px solid transparent;
  border-right: 10px solid transparent;
  position: absolute;
  bottom: -6px;
  left: 26%;
}

.progress-bar.active{
  animation: reverse progress-bar-stripes 0.40s linear infinite, animate-positive 2s;
}

@-webkit-keyframes animate-positive{
  0% { width: 0; }
}

@keyframes animate-positive{
  0% { width: 0; }
}
This awesome jQuery plugin is developed by phaelax. For more Advanced Usages, please check the demo page or visit the official website.